SentinelOne - SAML integration
The following document refers to a SAML integration between SentinelOne and TrustBuilder MFA.
Prerequisites
A SentinelOne console with administrator rights
An TrustBuilder MFA service with administrator rights
Configuration
The configuration consists of an exchange of metadata between the SP (SentinelOne) and the IdP (TrustBuilder): each provides its metadata to the other. Then, it is necessary to make sure that TrustBuilder provides attributes that match with the attributes of the SentinelOne so that the authentication works.
Step 1: Create TrustBuilder SAML connector
Login to your TrustBuilder MFA administration console.
Go to the Secure Sites tab.
In the "connectors” section, click on Add a connector of type… and select SAML 2.0.
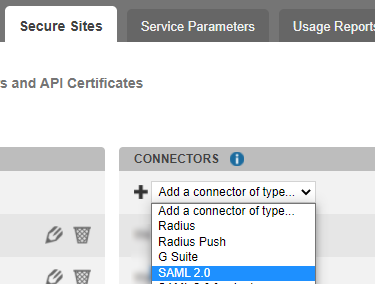
Name your connector.
Click on Add to create the connector.
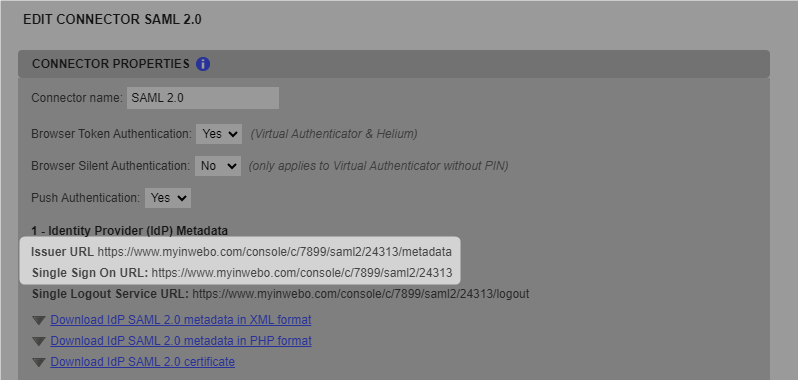
This will bring up the TrustBuilder (the Identity Provider) metadata.Click on ”Download IdP SAML 2.0 certificate” to save TrustBuilder certificate. You will need it later in SentinelOne configuration.
Keep this connector window open. You will need to copy/paste the Issuer URL and Single Sign On URL to SentinelOne later in the configuration.
Step 2: SentinelOne configuration
Log into your SentinelOne account as an administrative user.
In the left menu sidebar, click on Settings. The "SETTINGS" page opens.
Click the INTEGRATIONS tab.
Under "Types", click on SSO.
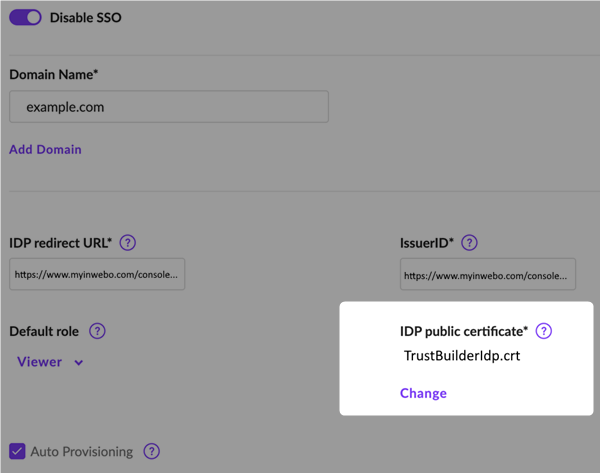
Click the Enable SSO toggle switch.
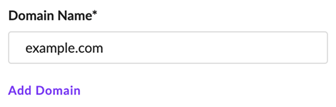
Enter your domain name into the Domain Name field.
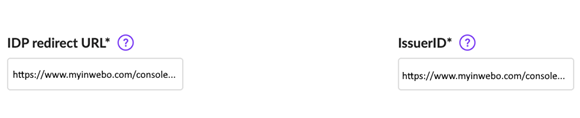
Copy the following URL from TrustBuilder connector and paste them into SentinelOne: the IssuerURL into IssuerID field and the Single Sign On URL into IDP redirect URL field.
Under "IDP public certificate", click on Upload. Select the TrustBuilder certificate file downloaded in TrustBuilder connector.
Keep this configuration window open.
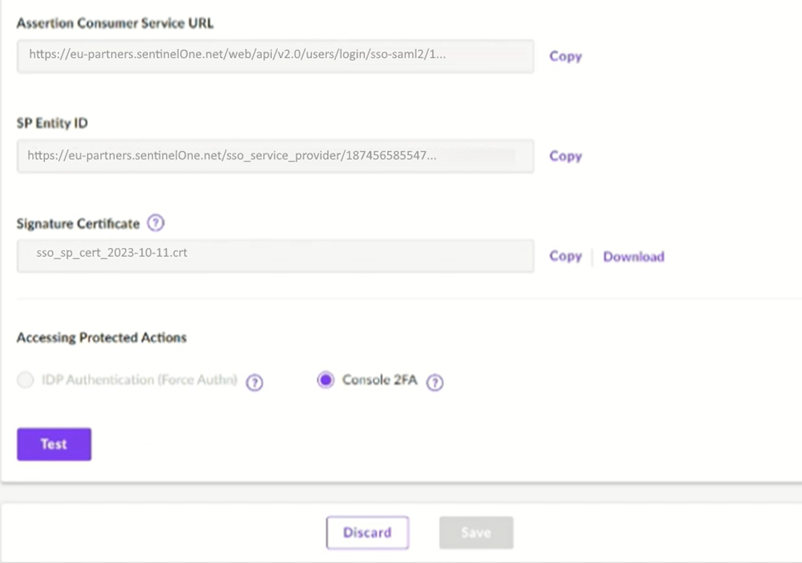
You will need the Assertion Consumer Service URL, the Single Sign On URL and the Signature Certificate to generate SentinelOne metadata (SP metadata).
You will come back later to finalize the configuration.
Step 3: Generate SentinelOne (SP) metadata
To allow SentinelOne and TrustBuilder to communicate, you should generate SentinelOne (the SP) metadata and provide them to TrustBuilder (the IdP).
You can download and modify the following XML file example to match your environment. → Download the SP metadata sample file
Make sure to configure: EntityID, Assertion Consumer Service and X509Certificate. These information can be copied from the SentinelOne configuration (see Step2).
Step 4: Finalize TrustBuilder SAML connector
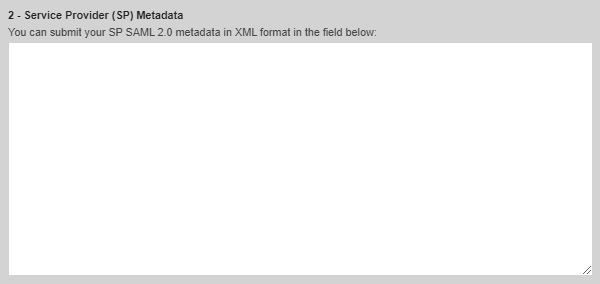
In TrustBuilder SAML 2.0 connector, paste the SentinelOne (SP) metadata.
Click on Update to save the configuration and unlock the remaining parameters.
Configure SAML Attributes to match with the attributes in SentinelOne.
In our example, SentinelOne uses the Mail attribute for authentication.
Click on Update to save the configuration.
If not automatically created, add the Secure Site associated to the connector (Secure Sites tab > Add a Secure Site of type … > Select your connector’s name).

The Called URL setting is only used to set a bookmark for the user on their self service portal, it has no impact on the security.
Step 5: Finalize the SentinelOne configuration
In SentinelOne configuration, click on Test.
You should be redirected to TrustBuilder webpage for authenticationClick on Save on the SentinelOne configuration page.