CloudFlare - SAML integration
The following page refers to a SAML integration between Cloudflare and TrustBuilder MFA.
Prerequisites
A Cloudflare console with administrator rights
A TrustBuilder MFA service with administrator rights
Configuration
The configuration consists of an exchange of metadata between the SP (Cloudflare) and the IdP (TrustBuilder): each provides its metadata to the other. Then, it is necessary to make sure that TrustBuilder provides attributes that match with the attributes requires by Cloudflare.
Step 1: Create TrustBuilder SAML connector
Login to your TrustBuilder MFA administration console.
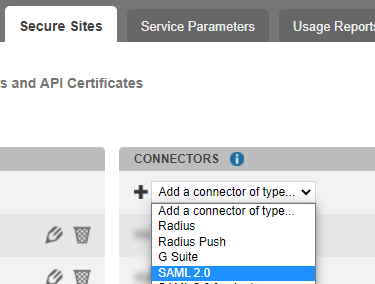
Go to the Secure Sites tab.
In the "connectors” section, click on Add a connector of type… and select SAML 2.0.
Name your connector.
Click on Add to create the connector.
This will bring up the TrustBuilder (the Identity Provider) metadata.Click on ”Download the Idp SAML 2.0 metadata in XML format” to save TrustBuilder metadata. You will need it later in Cloudflare configuration.
Keep this connector window open. You will need to copy/paste the Issuer URL and Single Sign On URL to Cloudflare later in the configuration.
Step 2: Cloudflare configuration
In Zero Trust, go to Settings > Authentication
In Login methods section, click on Add new and select SAML.
Choose a descriptive name for TrustBuilder.
Drop the TrustBuilder metadata (the XML file previously downloaded) to upload them.
The Single sign-on URL, the Entity ID or Issuer URL, and the Signing certificate parameters are filled out automatically.Click Save.
Step 3: Generate Cloudflare metadata
To allow Cloudflare and TrustBuilder to communicate, you should generate Cloudflare (the SP) metadata and provide them to TrustBuilder (the IdP).
Use the following Cloudflare endpoint to download its metadata: https://<your-team-name>.cloudflareaccess.com/cdn-cgi/access/saml-metadata
You can find your team’s name in Zero Trust under Settings > Custom Page
Step 4: Finalize TrustBuilder SAML connector
In TrustBuilder SAML 2.0 connector, paste the Cloudflare (SP) metadata.
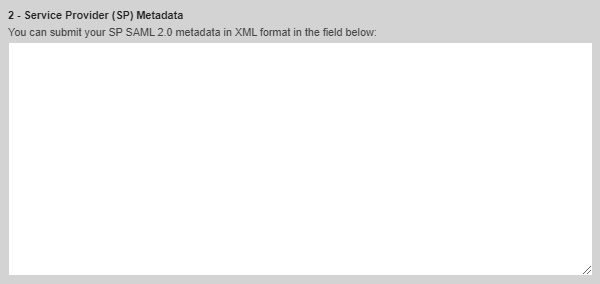
Click on Update to save the configuration and unlock the remaining parameters.
Configure SAML Attributes to match with the attributes in Cloudflare.
In this integration, Cloudflare uses the Name ID attribute set to Email format with the value of emailAddress.Set TrustBuilder Connector as below.
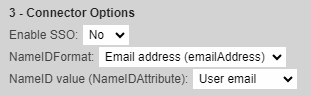
Click on Update to save the configuration.
If not automatically created, add the Secure Site associated to the connector (Secure Sites tab > Add a Secure Site of type … > Select your connector’s name).
Test the integration
To apply TrustBuilder MFA during the enrolment process of Cloudflare WARP agent:
Go to Zero Trust > Settings > Warp Client
Under Device enrollment, click on Manage.
Navigate to Authentication and select SAML TrustBuilder identity provider.
Test the integration: