VMWare Unified Access Gateway (UAG) Radius integration
inWebo MFA can be enabled as an authentication layer combined with VMware Unified Access Gateway (UAG) to verify users’ identities before they access the application server protected through Radius protocol.
VMware UAG online documentation is available here:
https://docs.vmware.com/en/Unified-Access-Gateway/3.10/com.vmware.uag-310-deploy-config.doc/GUID-0F1227DD-5F71-41AD-8C8C-BB5D62F1811E.html
The purpose of this guide is to explain how to use an inWebo Radius integration with your UAG.
A basic radius implementation enable the mobile and desktop token through push notifications or manual OTP generation.
1. Prerequisites
You need a VMware UAG up and running with a login/password authentication
You need an access as an administrator to an inWebo environment
2. inWebo Radius connector initial configuration
You need to connect to the inWebo administration console (myinwebo.com) to create a new Radius Push connector:
Into the inWebo administration console:
go to the "Secures Sites" tab
select "Add a connector of type... and chose "Radius Push”
add the public IP address of your VMware UAG and choose a secret (password) that will be shared with your VMware UAG.
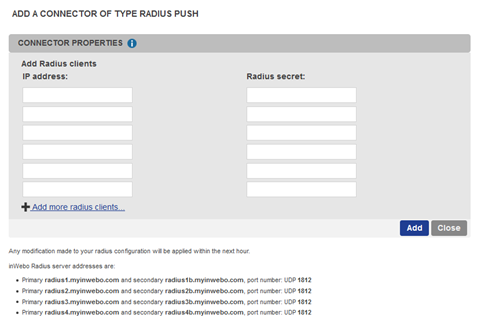
Then click on “Add”
The configuration on inWebo side is done.
Any modification made to your radius configuration will be applied within the next 15 minutes.
3. VMware UAG initial configuration
You need to connect to the VMware UAG administration console to create the Radius.
3.1 Create Radius connector to reach inWebo platform in UAG
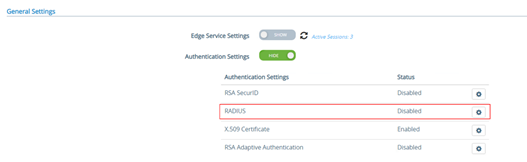
In the “General Settings” menu, activate the “SHOW” button of the “Authentication Settings”

Then enter the “RADIUS” settings menu
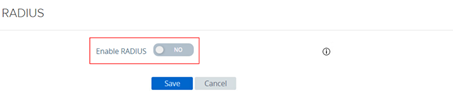
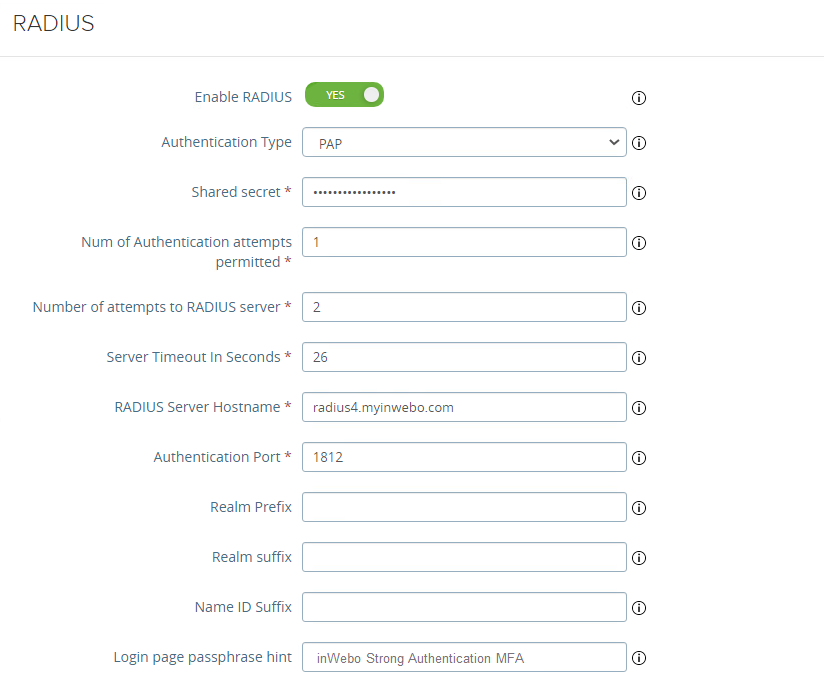
Enable RADIUS
Then fill the RADIUS settings form with inWebo information
You must choose PAP as “Authentication Type”
The shared secret is the Radius secret you have chosen into the inWebo Radius Push connector (section 2)
For the Number of Authentication attempts and the server timeout please read our recommendations at RADIUS integration and redundancy
Complete “Radius Server Hostname” with one inWebo’s radius server of your choice
Authentication Port is “1812”
We advise you to add a “Login page passphrase hint” to help your user understand when they will authenticate with inWebo MFA instead of a simple login / password
inWebo Radius server addresses :
Primary: radius-a.myinwebo.com (95.131.139.137)
Secondary: radius-b.myinwebo.com (217.180.130.59)
(See RADIUS integration and redundancy for additional details and configuration)
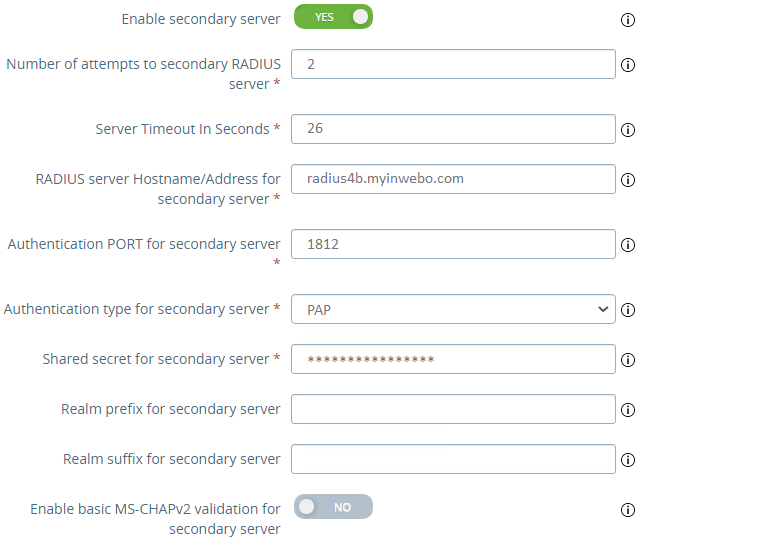
We advise you to add a secondary radius server by enabling “secondary server”
For the Number of Authentication attempts and the server timeout please read our recommendations at RADIUS integration and redundancy
Then you can “Save” your configuration
VMware UAG is now configured with the inWebo’s radius servers informations.
3.2 Apply Radius Authentication
Next step is to protect VMware UAG access with radius authentication against inWebo radius servers.
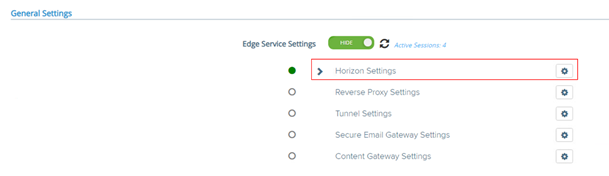
In the “General Settings” menu, in the section “Edge Service Settings”, click on “SHOW”

Then enter the “Horizon Settings” menu
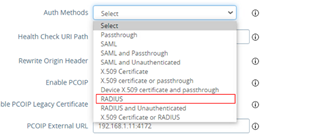
At the bottom of the new page, click on “More”, to display extra settings fields
Select “RADIUS” as the“Auth methods”,
With this option the authentication will be done in 2 steps by default:
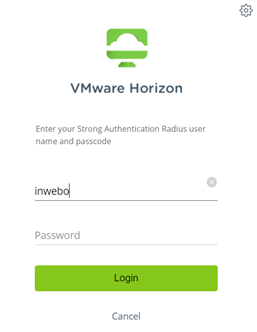
First step - inWebo MFA authentication : A first login page with a login and password field to perform the Strong Authentication based on Radius.
This first page will display the previous “passphrase hint” configured in your Radius settings. Your users will need only to enter their login, they do not have to enter anything in the password field at that step.
Second step - password authentication: A second login page with a login and password field to perform standard authentication
Your users needs to enter their login and password.
Then you can “Save” the configuration at the bottom of the page.
Warning: that will apply inWebo Strong authentication based on Radius, be sure to have at least an enrolled and valid inWebo token (mobile or desktop) and still have local access to your UAG in case of issue.
3.3 Extra configuration - not mandatory:
VMWare UAG let you modify the login page customer journey (2 steps) with some specific options (not mandatory
You can activate the setting “Match Windows Username” so your users will not have to enter their login on second step. They will enter their login only in step 1

4 Test the 2 steps authentication
Settings: “Match Windows Username” set at ON
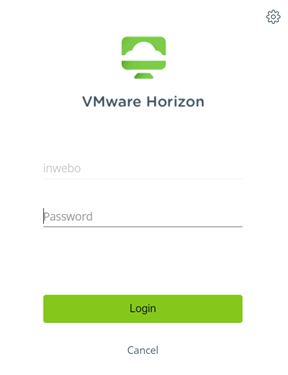
To perform a test, you will need to have an active user with at least a valid token (mobile, pc token). We will perform the test with the VMware Horizon HTML Access (you can do it on the Horizon Client as well)
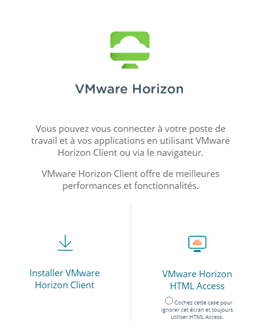
Launch a browser and open your UAG portal url
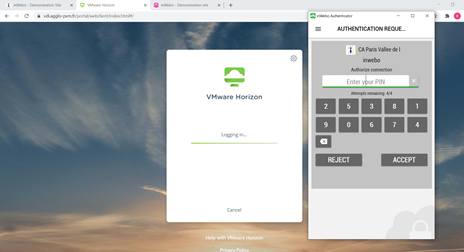
Step 1- Strong authentication : Enter your login and leave the password field blank. Click on login.
You can see into the label the “passphrase hint” configured previously in your Radius configuration.
(You can also manualy generate an OTP and paste it into the password field if you don’t want to use the push notification mechanism)
Then, as a step 2, you will have to enter your password to be connected. Your login is already filled with the login of Step 1 (“Match Windows Username” at ON)
You are connected