SSL VPN Sophos UTM with inWebo RADIUS integration
Prerequisite
Sophos UTM
inWebo account
Note: the following configuration and screnshots are based on Sophos UTM 9.5
Configure the RADIUS server (UTM)
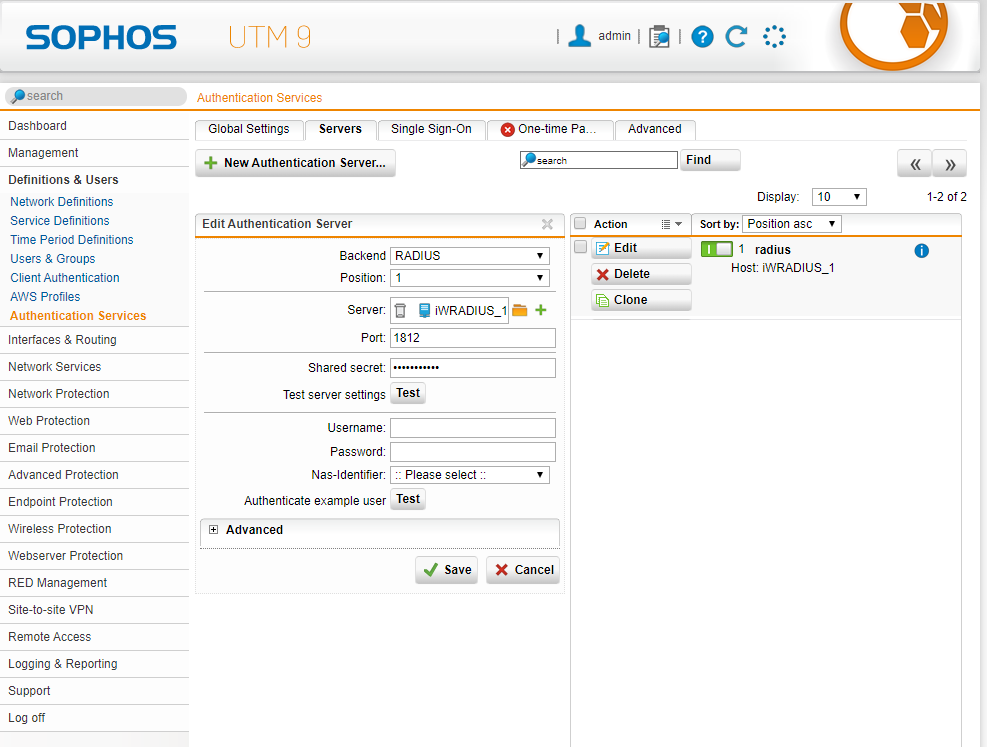
Navigate to Definition & Users > Authentication Services > Servers tab
Click + New authentication Server
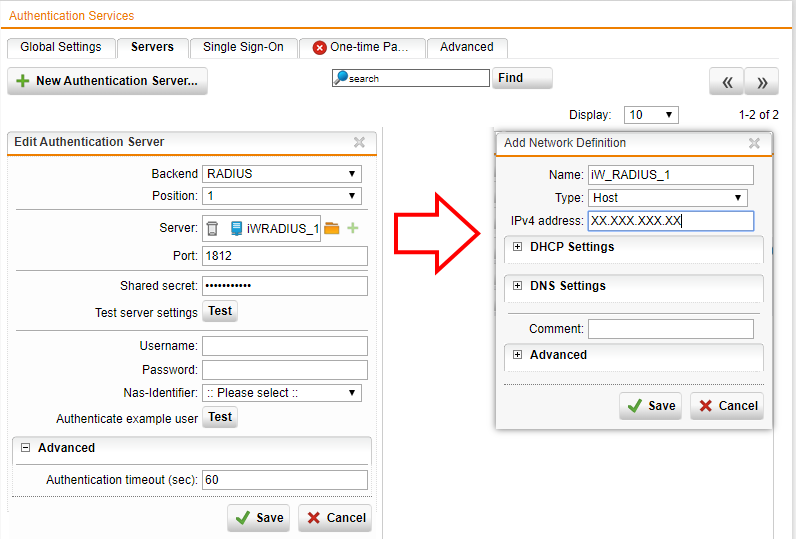
Fill in the parameters as shown below:
Backend: RADIUS
Position: Top (after saving this form, it becomes 1)
Server: Define the inWebo Radius Server
Name > Define a name for the inWebo Radius server authentication
Type > Host
IPv4 address > enter inWebo Radius server IP addresses (see below)
Click on Save
Port: 1812 (default port)
Shared Secret: Enter the Radius secret shared with inWebo
Authentication timeout (sec): the expiration time must be sufficient for authentication to be completed. We recommend to set this value to 60 in order to let user to grab his handle his mobil phone en validate the authentication
Click on Save
inWebo RADIUS authentication server
Fill the indication for your inWebo RADIUS authentication servers.
inWebo Radius server addresses :
Primary: radius-a.myinwebo.com (95.131.139.137)
Secondary: radius-b.myinwebo.com (217.180.130.59)
(See RADIUS integration and redundancy for additional details and configuration)
Configure the inWebo RADIUS connector
Log in to the inWebo administration console https://www.myinwebo.com/console
Navigate to the Secure site tab
Add a Radius Push connector in the Connectors section
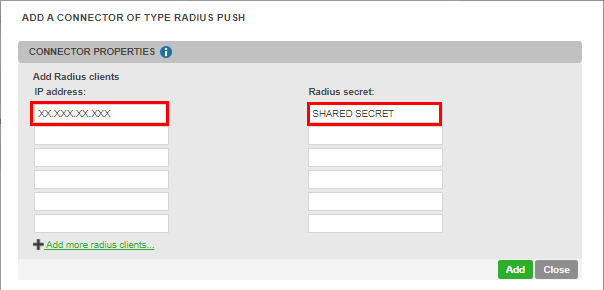
Fill in the parameters as shown below:
IP Address: fill with the IP of the public interface of your Sophos UTM 9 (or NAT address if behind a firewall)
Radius secret: it is a secret shared between Sophos UTM and the inWebo Radius server
Click on Add
Please note that "any modification to the configuration of your RADIUS connector will be applied within the hour".
Activate User Portal
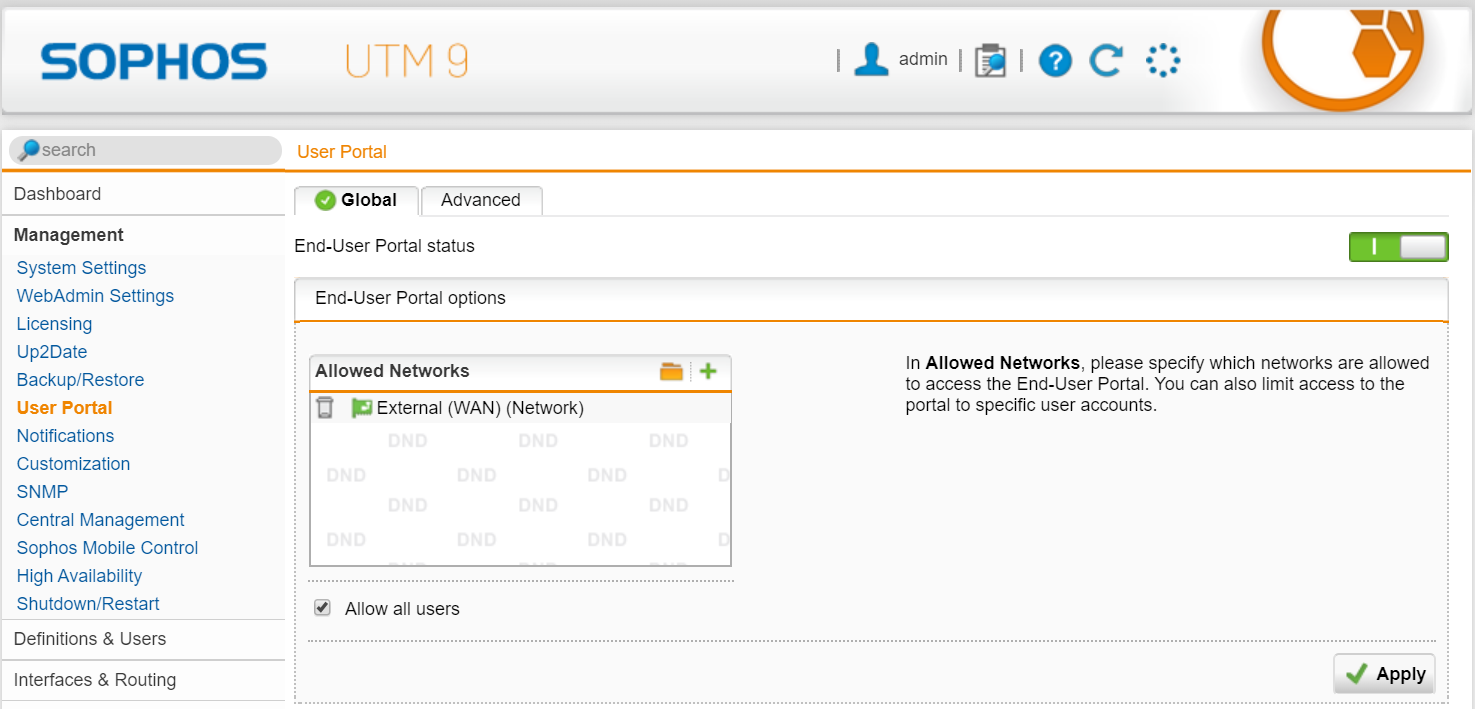
Navigate to Management > User Portal > Global tab
Add Allowed Networks: Networks authorized to access the end user portal
Click on Apply
Configure the Sophos UTM User Portal to use inWebo
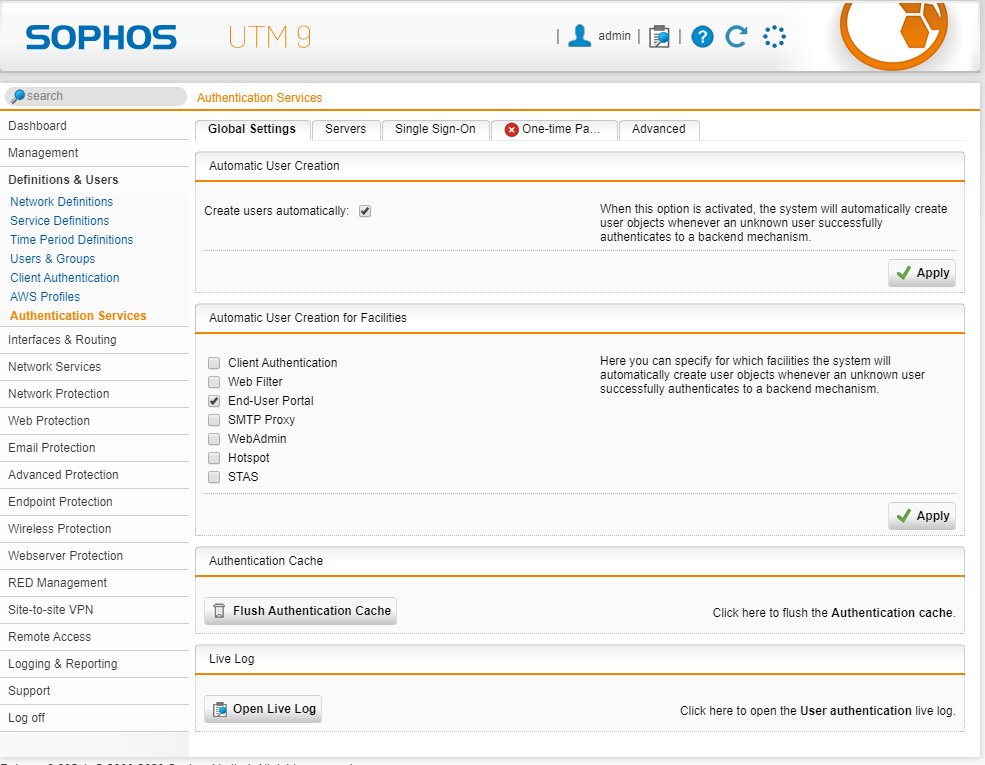
Navigate to Definition & User > authentication Services > Global Settings tab
Activate "Create users automatically" in the Automatic User Creation section and click Apply
Enable End-User Portal in the "Automatic User Creation for facilities" section and click Apply
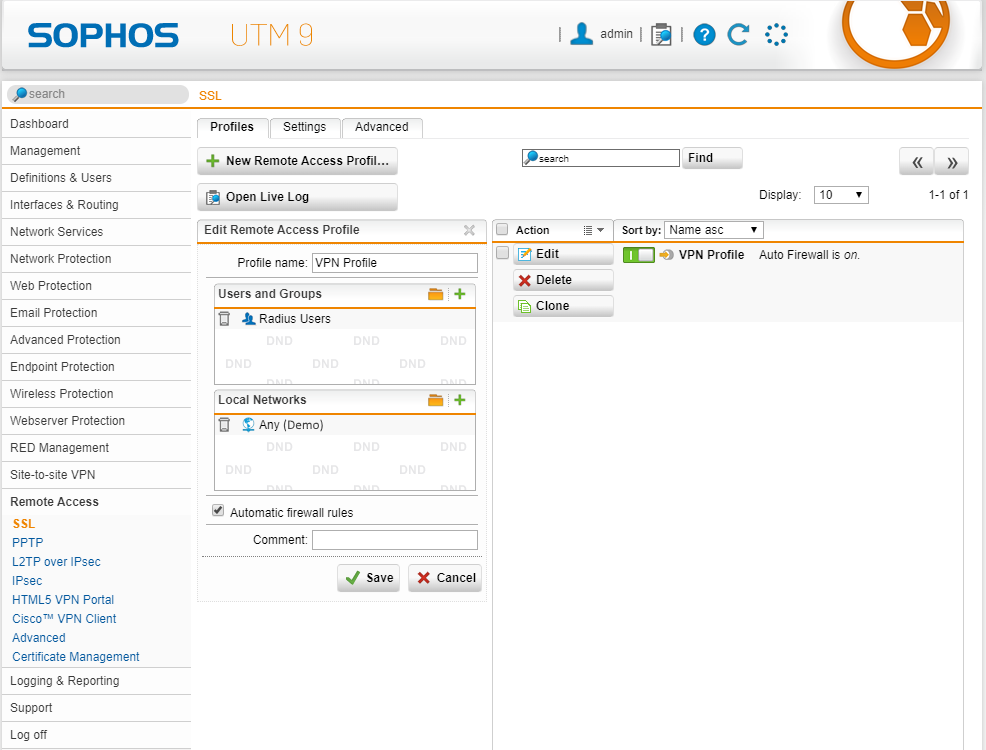
Configure SSL VPN to use inWebo
Navigate to Remote Access > SSL > Profile
Click on New Remote Access Profile
Make the following setting:
Define a profile name
User and Groups: Radius Users
Local Network: Local networks which should be accessible for the selected SSL clients via the SSL VPN tunnel
Click Save
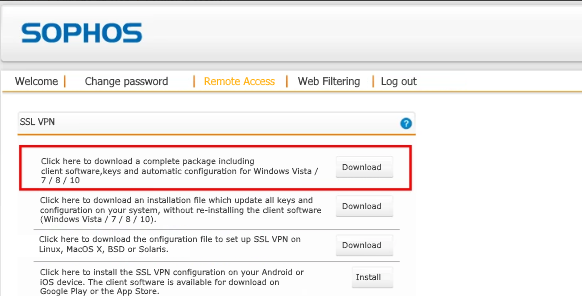
Configure the SSL VPN client in Windows environment
Log in with an inWebo authenticated account via the Sophos UTM User Portal
Navigate to the Remote Access tab
Download and install the client package
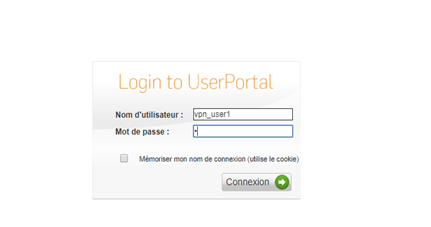
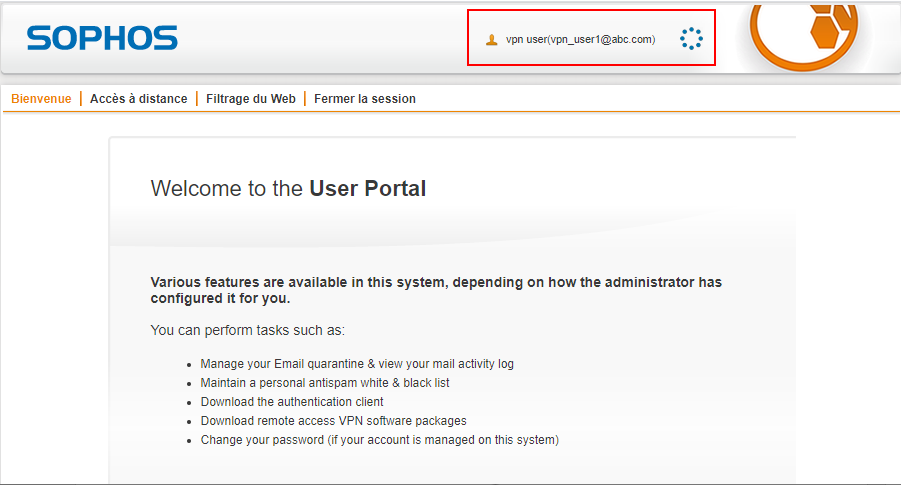
Testing RADIUS inWebo authentication with the SOPHOS user portal
To test your setup, attemp to log in to Sophos User Portal as a user enrolled in inWebo with an authentication device (mobile or desktop token).
Indicate your login (username) and a correct OTP in Radius standard mode or a random character in Radius "push" mode.
In Radius push mode you'll receive a notification on your mobile/desktop device as you can see in the screenshot below:
 | 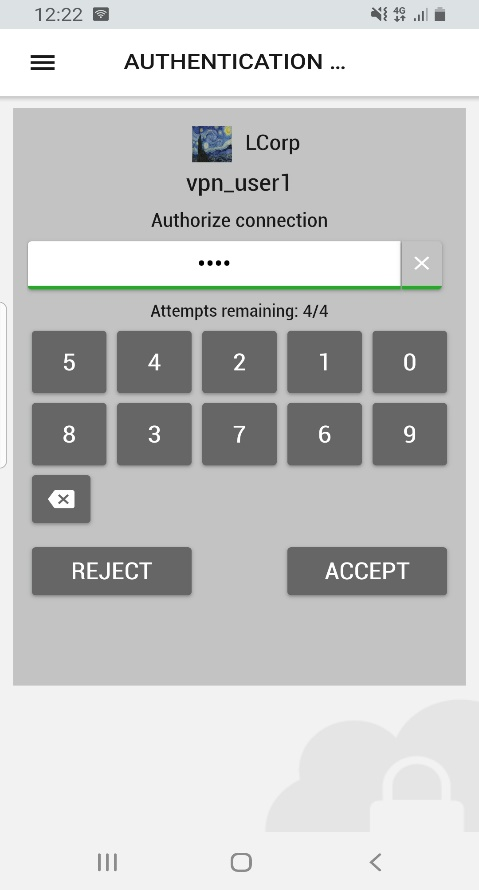 |
|---|
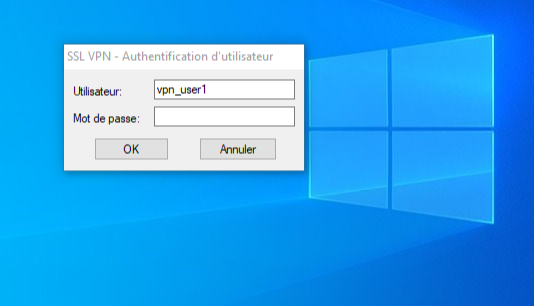
Testing RADIUS inWebo authentication with the SOPHOS SSL VPN client
To test your setup, attemp to log in to Sophos SSL VPN client as a user enrolled in inWebo with an authentication device (mobile or desktop token).
Enter your login (username) and an OTP as a password in Radius standard mode or leave the password empty in Radius "push" mode.
In Radius push mode you'll receive a notification on your mobile/desktop device as you can see in the screenshot below:
 | |
|---|
