NetIQ Access Manager, Custom Authentication Module
Requirements
Installation
$ sudo unzip iw-netiq-auth-*.zip -d /tmp/netiq-ui-inwebo
$ sudo cp /tmp/netiq-ui-inwebo/edit-webapp/WEB-INF/lib/iw-netiq-auth-*.jar /opt/novell/nam/idp/webapps/nidp/WEB-INF/lib/
$ sudo cp /tmp/netiq-ui-inwebo/edit-webapp/jsp/inWeboLoginPage.jsp /opt/novell/nam/idp/webapps/nidp/jsp/
$ sudo cp /tmp/netiq-ui-inwebo/edit-webapp/jsp/inWeboLoginPage2.jsp /opt/novell/nam/idp/webapps/nidp/jsp/
$ sudo cp /tmp/netiq-ui-inwebo/edit-webapp/javascript/inWeboBrowser-*.js /opt/novell/nam/idp/webapps/nidp/javascript/
$ sudo cp /tmp/netiq-ui-inwebo/edit-webapp/images/* /opt/novell/nam/idp/webapps/nidp/images/
$ sudo cp /tmp/netiq-ui-inwebo/edit-webapp/css/inwebo.css /opt/novell/nam/idp/webapps/nidp/css/
$ sudo cp /tmp/netiq-ui-inwebo/edit-webapp/css/inwebo-internal.css /opt/novell/nam/idp/webapps/nidp/css/
$ sudo /etc/init.d/novell-idp restart
Creating the "NetiQ" secure siteInWebo Secure site configuration
go to inWebo Admin Console
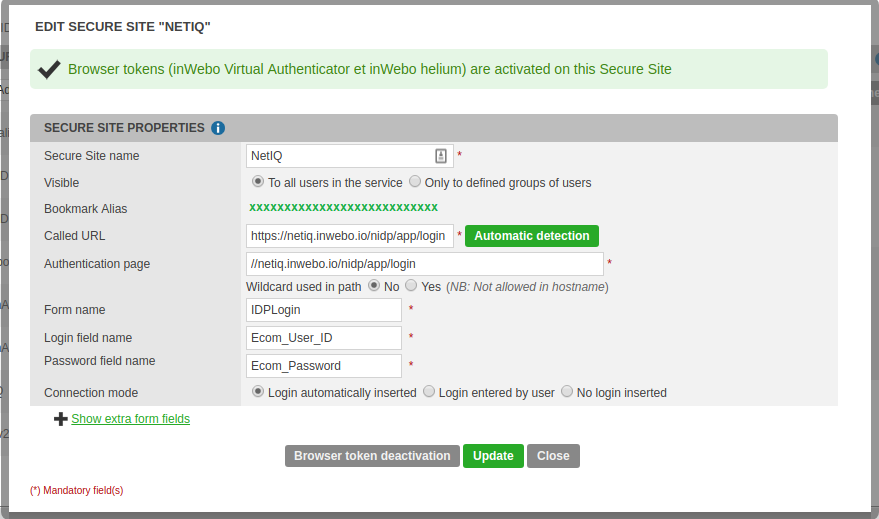
navigate to the "Secure Sites" tab and create a new Web Services Secure Sites:
Called URL: https://your_netiq_site/nidp/app/login
Authentication page: //your_netiq_site/nidp/*
Form : IDPLogin
Login field : Ecom_User_ID
Password: Ecom_Password
Update and create the browser token, Copy the newly created "Bookmark alias" for later use
Creating an inWebo Certificate
Navigate to the "Secure Sites" tab and create a new certificate in .p12 format for your service with a "Passphrase"
Transfer this certificate in SSH/SFTP to your NetIQ access manager appliance.
Configuring NetIQ Access Manager:
Prerequisite
Configuring a service in the "Advanced Authentication" settings
Registering inWebo class: InWeboAuthModuleClass
go to Admin console and Login as 'admin'
navigate to Devices->Identity Servers→IDPCluster
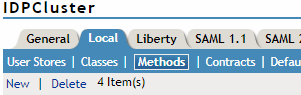
Select "Local" tab
Select "Classes" > "New"
The "General" tab
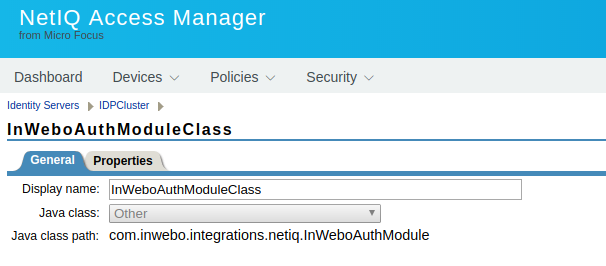
Fill the form "Create Authentication Class" as follow:
Display name: inWeboAuthModuleClass
Java class: "Other"
Java class path: com.inwebo.integrations.netiq.InWeboAuthModule
Click "Next"
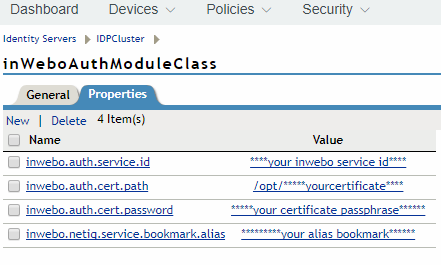
The "Properties" tab
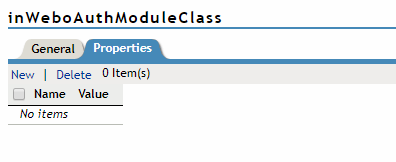
Fill the "Properties" tab with at least 4 properties:
inwebo.auth.cert.path
inwebo.auth.cert.password
inwebo.netiq.service.bookmark.alias
Add "new" properties: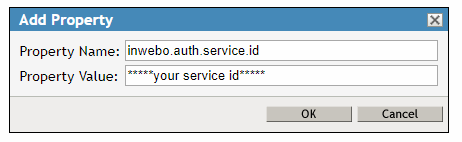
Check the minimum requirement for inWeboAuthClass Properties:
For the inwebo.auth.cert.path, you have to indicate the path where is located the inWebo .p12 certficate you have transfered to the appliance.
inWeboAuthClass Properties:
Property Name | Default Value | Description |
|---|---|---|
inwebo.base.url | Base URL inWebo | |
inwebo.auth.service.id | inWebo Service Id - Required | |
inwebo.auth.cert.path | Full Path to inWebo Certificate File (p12) - Required | |
inwebo.auth.cert.password | inWebo Certificate Password (p12) Required | |
inwebo.netiq.service.bookmark.alias | inWebo bookmark alias - Required | |
inwebo.proxy.https | true | Set true if HTTPS proxy or else false |
inwebo.proxy.host | Host Name or IP of a HTTP proxy | |
inwebo.proxy.port | Port of a HTTP proxy | |
inwebo.proxy.username | user name which will be used for HTTP proxy authentication | |
inwebo.proxy.password | user password which will be used for HTTP proxy authentication |
Creating a new Method for inWebo authentication
go to Admin console and Login as 'admin'
navigate to Devices->Identity Servers→IDPCluster
Select "Local" tab
Select "Methods" > "New"
Create a new Methods with class: inWeboAuthMethod
And select the Class: inWeboAuthModuleClass
Exemple 1: Basic integration
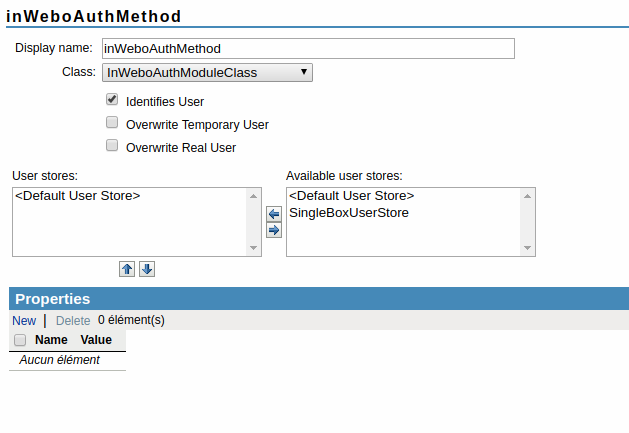
Select the LDAP "User stores" synchronized with your inWebo service
Click "Finish"
modify /opt/novell/nam/idp/webapps/nidp/jsp/nidp_latest.jsp. Add in HTML tag <head>:
<link rel="stylesheet" type="text/css" href="<%=request.getContextPath()%>/css/inwebo-internal.css"/>
<script type="text/javascript" src="https://ult-inwebo.com/webapp/js/helium.min.js">
</script> <script type="text/javascript" src="https://ult-inwebo.com/va/client.js"></script>
Exemple 2: integration without NetIQ Header
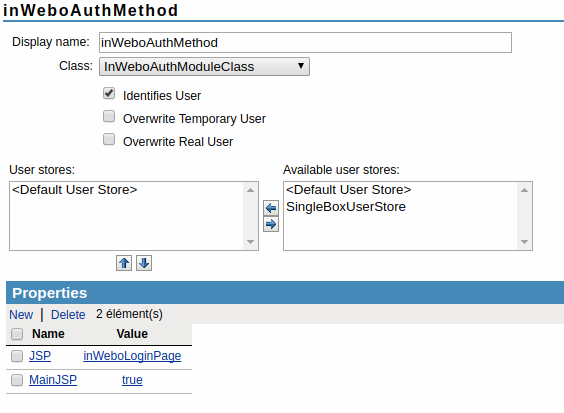
Select the LDAP "User stores" synchronized with your inWebo service
input the following properties:
JSP : inWeboLoginPage2
MainJSP : true
Click "Finish"
Creating a new Contract or modifying you existing contract
The "General" tab
go to Admin console and Login as 'admin'
navigate to Devices->Identity Servers→IDPCluster
Select "Local" tab
Select "Contracts" > "New" or select your current contract
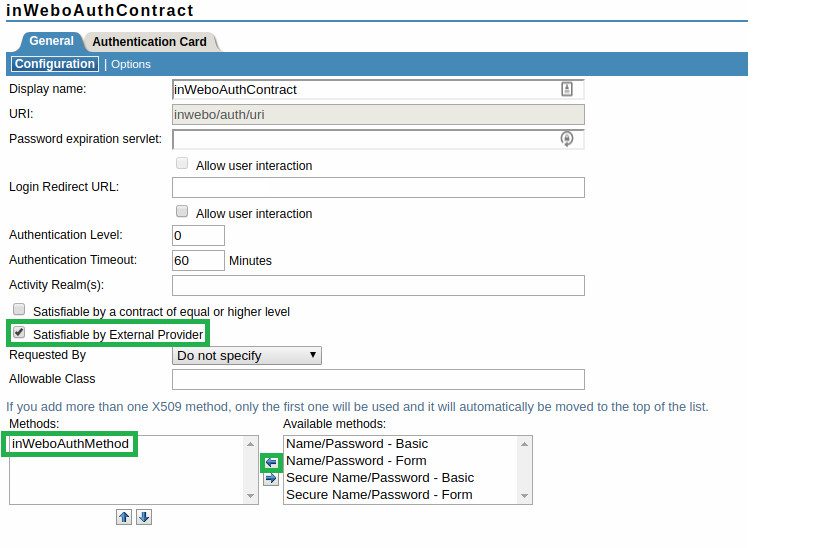
Fill the name of your contract ex :"inWeboAuthContract" for a new contract
Fill the URI: inwebo/auth/uri
Check the "Satisfiable by External Provider condition"
Add Method: "inWeboAuthMethod"
Select "the Authentication card" tab
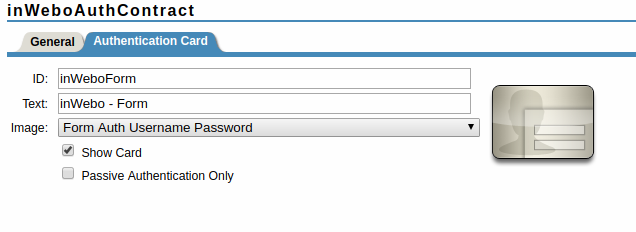
Fill the ID of your form : inWeboForm
And select the aspect you want for the inWebo Authentication card.
Click "OK"
Update your Access Manager configuration
On the Dashboard panel, select the number beside your Identity servers icons
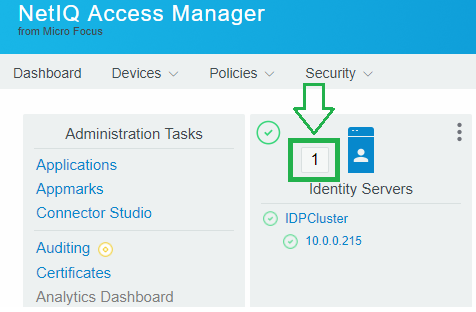
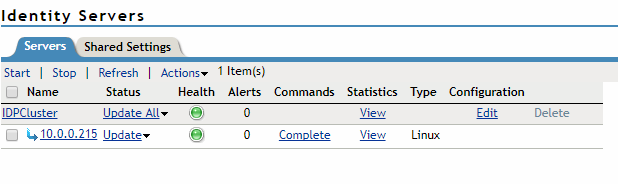
Select "Update All" and wait before Refreshing the page
Login Page test
If you use "inWeboAuthContract" as "Default" Authentication mode for your local settings you can connect to : https://your_host_appliance/nidp/ and test your inWebo login page.
Proxy Configuration:
goto Admin console and Login as 'admin'
navigate to Devices->Identity Servers->IDPCluster->Local
edit your inWeboAuthClass Classes and add properties:
inwebo.proxy.https
inwebo.proxy.host
inwebo.proxy.port
inwebo.proxy.username
inwebo.proxy.password
/etc/init.d/novell-idp restart