HubSpot SAML integration
The following steps are necessary to configure HubSpot to use inWebo as a SAML IDP to authenticate users with multi-factor authentication.
inWebo SAML connector initial configuration
Create a new SAML connector in the inWebo Administration console
Go to the "Secures Sites" tab,
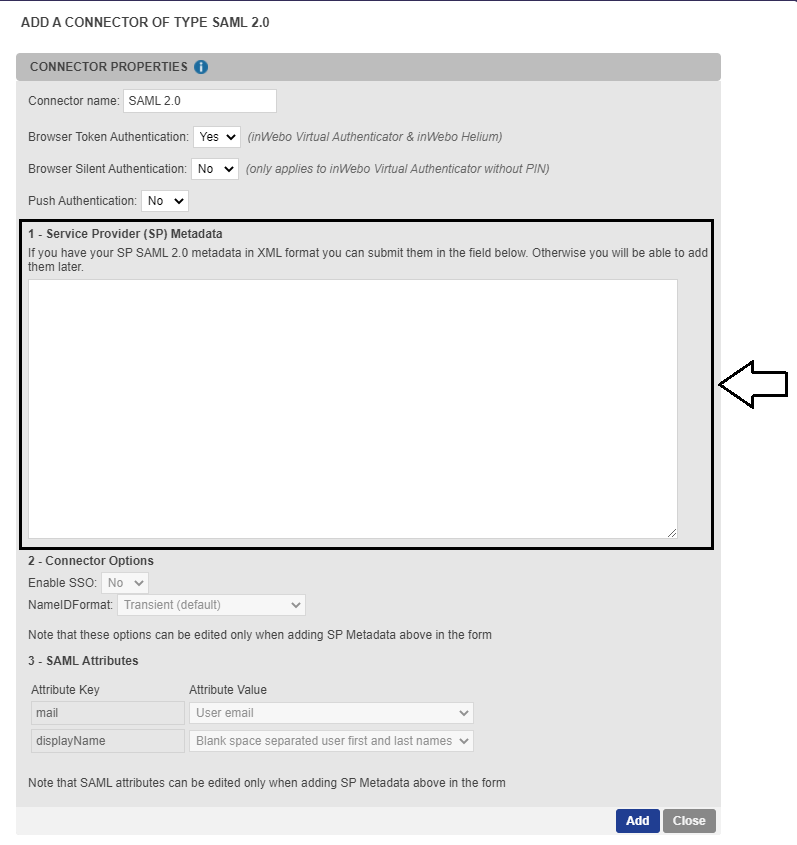
Select "Add a connector of type" SAML 2.0.
In your SAML connector properties :
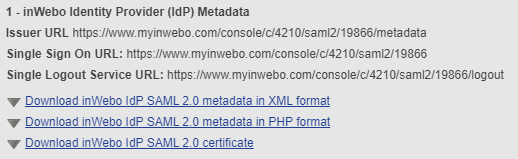
note down the “Issuer URL” and the “Single Sign On URL”
click on “Download inWebo IdP SAML 2.0 certificate
HubSpot SAML initial configuration
To get the Audience URI and Sign on URL, ACS, Recipient, or Redirect values:
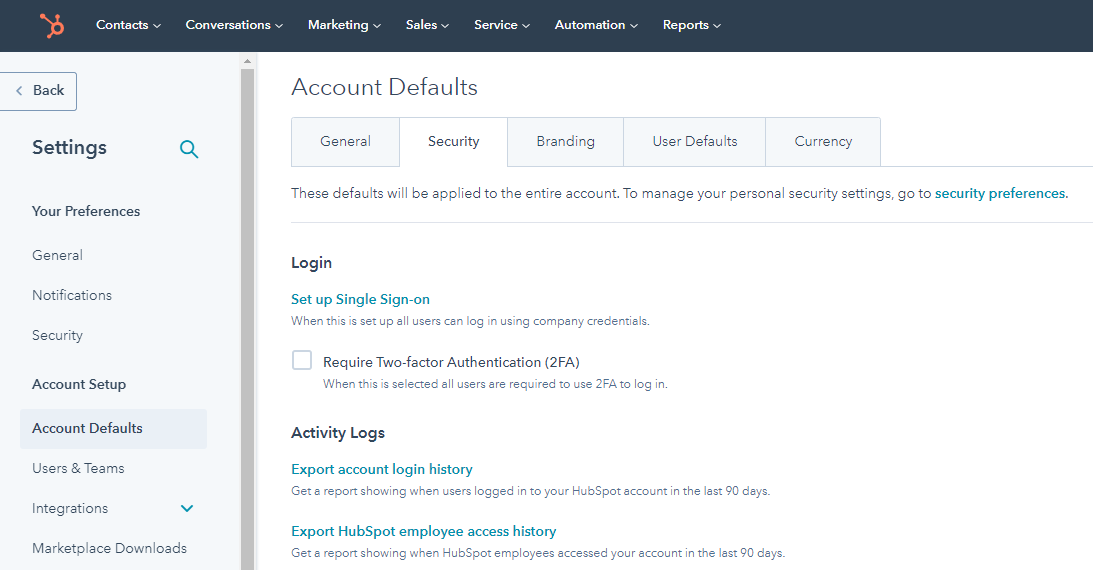
In your HubSpot account, click the settings settings icon in the main navigation bar.
In the left sidebar menu, select Account Defaults.
Click the Security tab.
Under Login, click Set up Single Sign-on
From right panel, copy the Audience URI and the Sign on URL and past them in the following metadata.
<md:EntityDescriptor xmlns:md="urn:oasis:names:tc:SAML:2.0:metadata" entityID="INSERT_AUDIENCE_URI_HERE">
<md:SPSSODescriptor AuthnRequestsSigned="true" WantAssertionsSigned="true"
protocolSupportEnumeration="urn:oasis:names:tc:SAML:2.0:protocol">
<md:AssertionConsumerService Binding="urn:oasis:names:tc:SAML:2.0:bindings:HTTP-POST" Location="INSERT_SIGN_ON_URL_HERE" index="0"/>
</md:SPSSODescriptor></md:EntityDescriptor>
Finalize inWebo SAML connector configuration
Provide SP metadata
inWebo SAML 2.0 connector needs to know the metadata of your SAML Service Provider authentication instance to communicate with it.
In your inWebo administration console, go to the Secure Sites tab.
Edit the SAML 2.0 connector previously created.
Paste the Service Provider (SP) metadata.
Click on Update to save the configuration.
Configure SAML Assertion
Edit the SAML connector in the inWebo administration console and configure section 3 as follow.
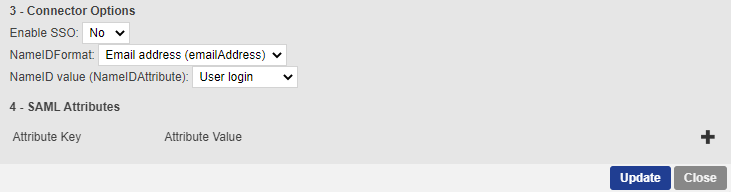
Remove the SAML Attributes in section 4.
Click on “Update” to save your modifications.
Finalize inWebo SAML connector configuration
Copy the Issuer URL and the Single Sign On URL from inWebo connector section 1.
Open the inWebo certificate with a text editor and copy paste its content in X.509 Certificate field.
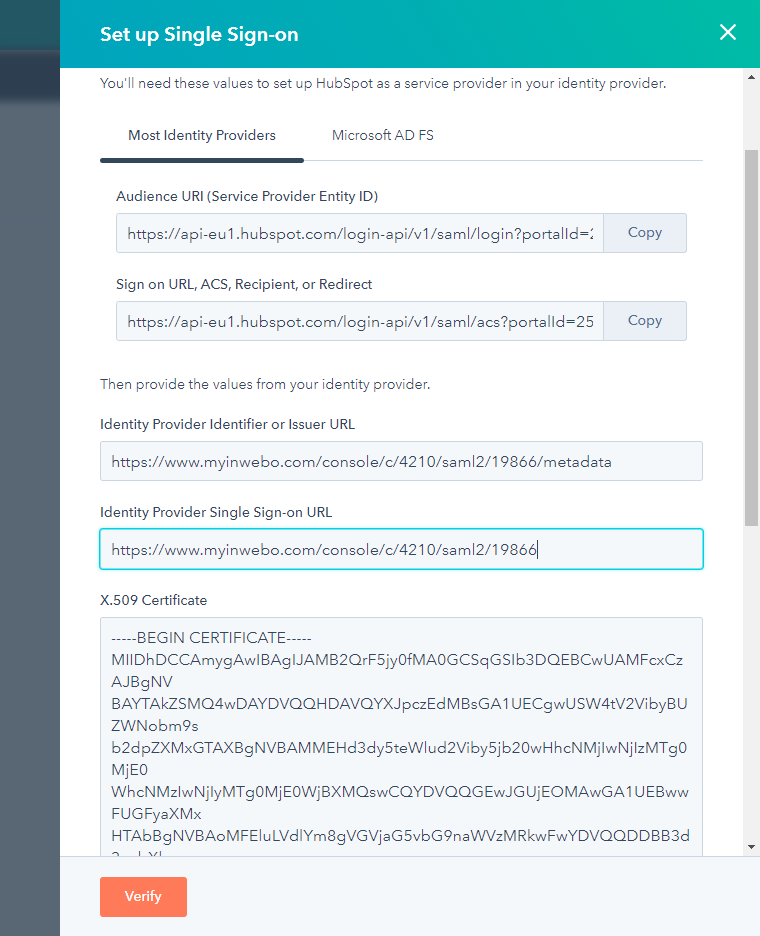
Click on “Verify”. An extra window opens to verify the configuration.
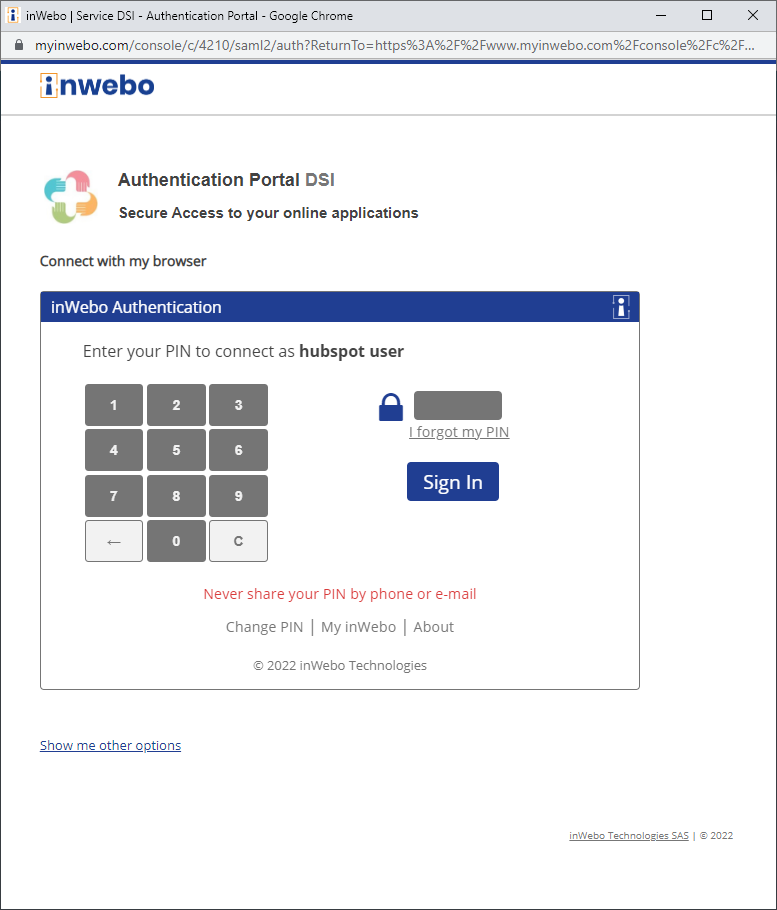
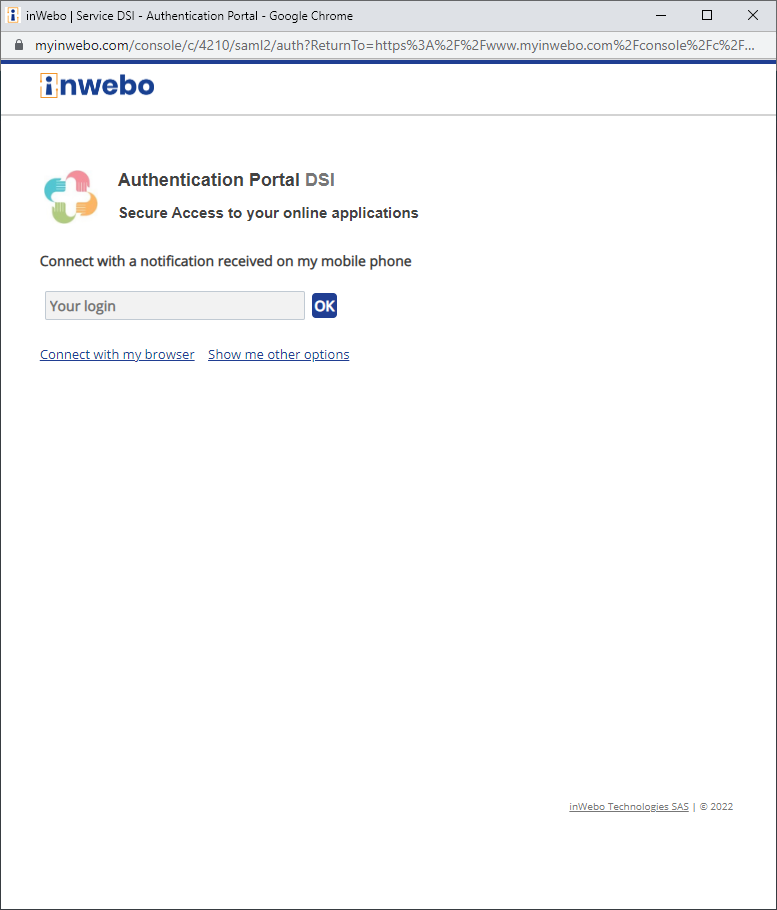
If your browser is not enrolled with your account you can provide your login to receive a push authentication request on Authenticator.
Once the authentication is successful, the HubSpot admin console displays the message “Single Sign-on settings saved”.
Test Authentication
After completing the previous steps, users can log in by clicking on “Log in with SSO”, entering their email, and satisfying the inWebo authentication request. See next section to disable login/password authentication and enforce inWebo authentication.
Here is an example with an inWebo browser token.
Enforce inWebo as the only authentication method
In order to secure users account you must disable login/password authentication. If you need to allow login/password for specific users you can exclude some users (see bellow).
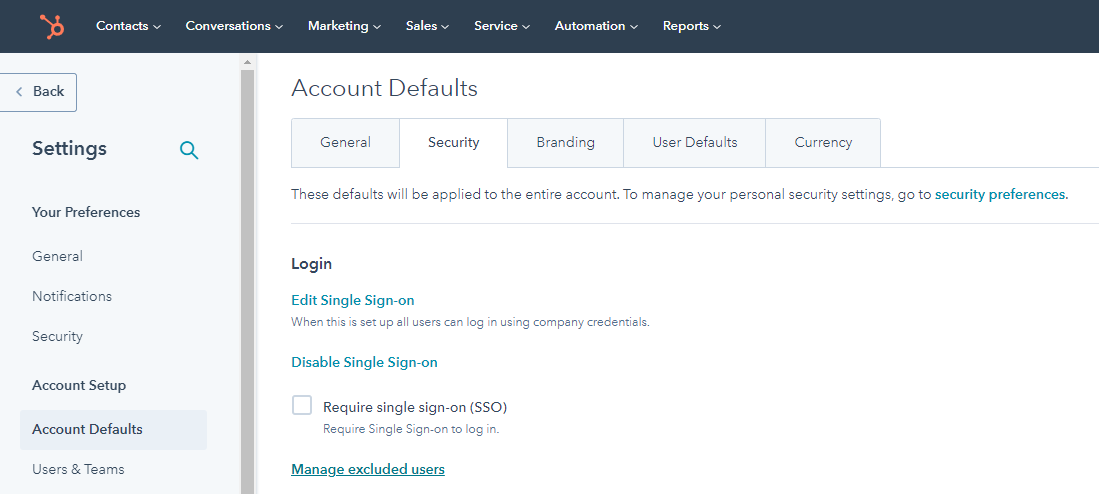
In your HubSpot account, click the settings settings icon in the main navigation bar.
In the left sidebar menu, select Account Defaults.
Click the Security tab.
Under Login, click Require single sign-on (SSO) and validate the pop-up
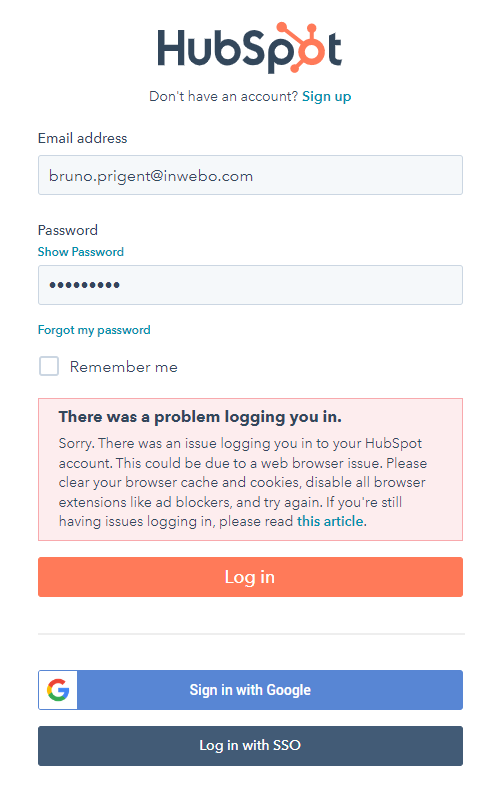
From now when a user tries to sign-in with his login and password, HubSpot shows the following error. The user now needs to click on “Login with SSO” button.
Optional : exclude specific users from SSO policy
In your HubSpot account, click the settings settings icon in the main navigation bar.
In the left sidebar menu, select Account Defaults.
Click the Security tab.
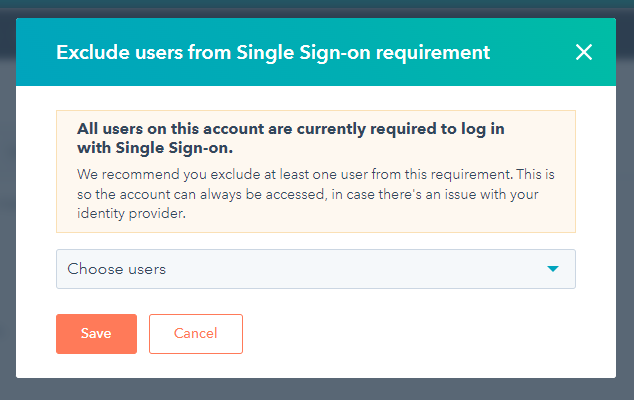
Under Login, click Manage excluded users
Use the drop-down menu to select which users to exclude from the SSO policy and click on Save. Those users will be allowed to connect using their HubSpot login and password.