Fortigate - SAML integration
This documentation refers to a TrustBuilder MFA SAML integration with a basic configuration of the Fortigate in term of VPN access. You may have to adjust the configuration depending of your Fortigate configuration.
Prerequisites
Before you start, please ensure that the following requirements are fulfilled.
You will need at least to use a Fortigate version 6.4.0 or superior to be able to deploy a SAML implementation. Before this version you can configure TrustBuilder MFA through a Radius or LDAP Proxy integration.
A TrustBuilder MFA service with administrator rights (if you don't have any service yet, you can register for a trial account here.
An administrator access to your Fortigate environment for the implementation.
Configuration
Step 1: Create a SAML connector on TrustBuilder platform
Login to the administration console.
Go to the “Secure Sites” tab.
In the "Connectors” section, click on “Add a connector of type” and select “SAML 2.0”.
Click on “Add”. The SAML connector on TrustBuilder side has been created. You will need to use the Identity Provider (IdP) Metadata during the configuration of your Fortigate.
Download the TrustBuilder IdP certificate. You will import it into your Fortigate later.
You will come back later to this connector to insert the Fortigate SP metadata.
Step 2: Create a secure site on TrustBuilder platform
Login to the administration console.
Go to the “Secure Sites” tab.
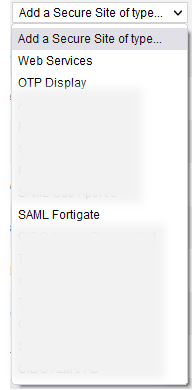
Click on “Add a Secure Site of type” and select the SAML connector name you configured related to your SAML connector for Fortigate.
In the opening window, set the Secure Site name of your choice and the Called URL to point to your Fortigate internet address.
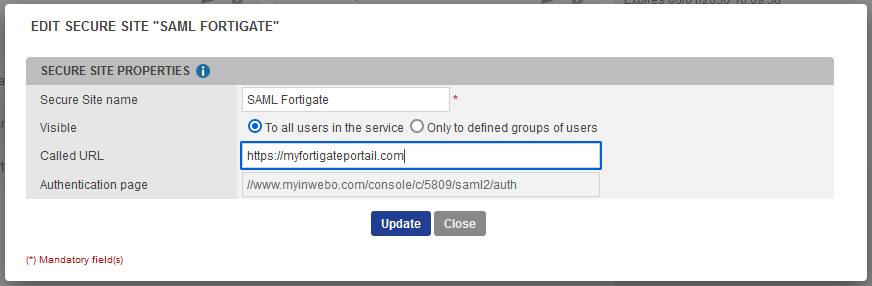
The Called URL setting is only used to set a bookmark for the user on My account portal, it has no impact on the security.
Click on “Add” to save the configuration.
The secure site related to your SAML connector for Fortigate, has been successfully created.
Step 3: Import the IdP certificate
You should import the TrustBuilder (formerly inWebo) IdP certificate in order to be able to configure it into you Fortigate Single Sign-on Configuration:
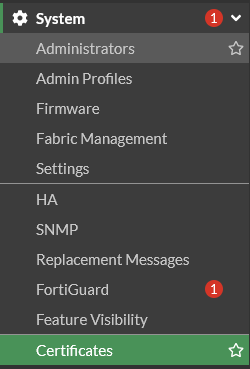
Go to System → “Certificates”
Click on “Create / Import” and select “Remote Certificate”
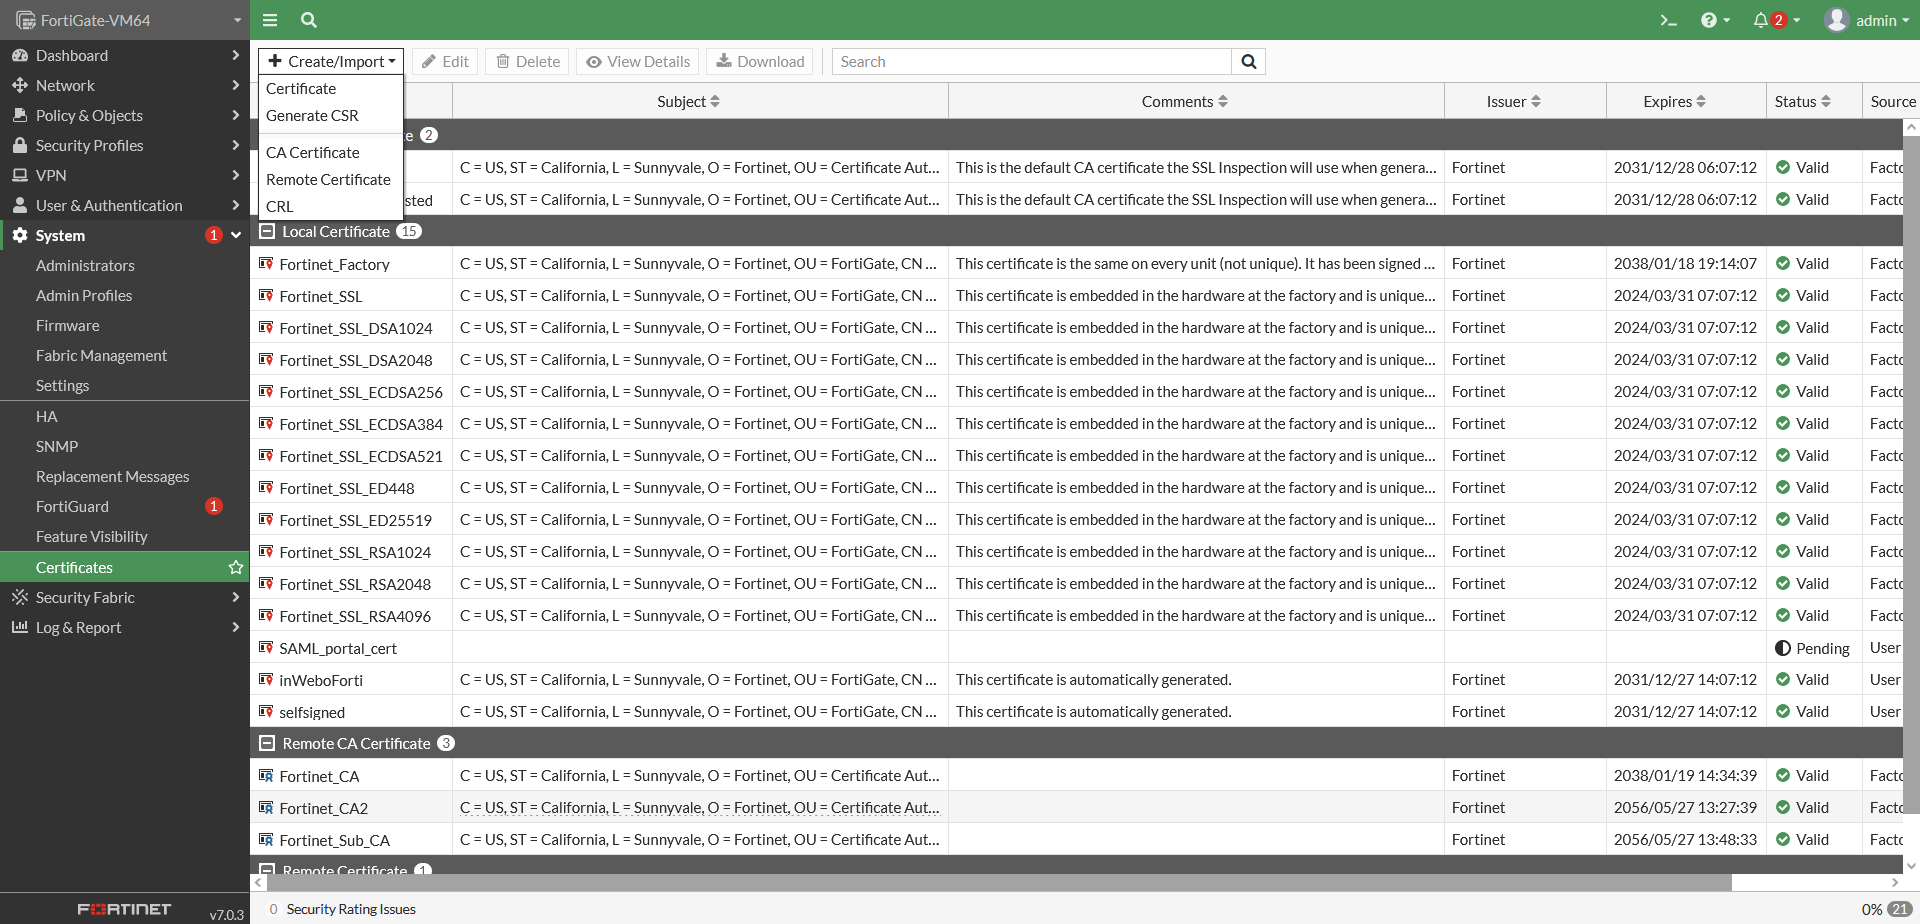
Select the TrustBuilder (formerly inWebo) certificate that you downloaded earlier from the administration console . Click on “OK”.
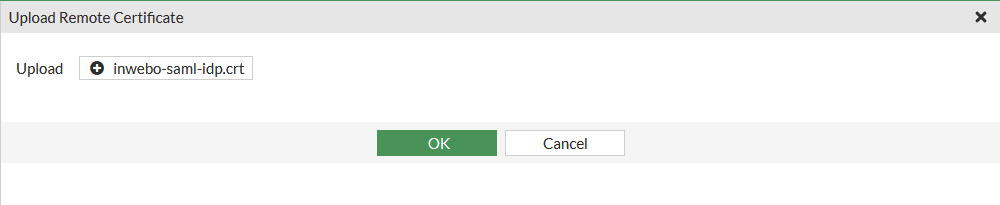
The TrustBuilder certificate has been imported.

You may face issues importing the certificate through the GUI of Fortigate. We recommend using the following CLI commands to import the certificate:
#config vpn certificate remote#edit inWeboSAML#set remote "-----BEGIN CERTIFICATE----- -----END CERTIFICATE-----"#end
Edit and Copy/Paste the content of TrustBuilder certificate file (.crt) between the " " of the set remote command.
Step 4: Provide the TrustBuilder IdP metadata to Fortigate
Please, click to see the details for your Fortigate version.
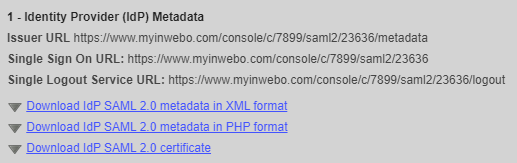
Retrieve TrustBuilder IdP metadata (in your Fortigate SAML connector in TrustBuilder administration console) to find the Issuer URL, the Single Sign-On URL and the Single Logout Service URL:

Enter the following CLI commands:
CODE```fgt config user saml edit "saml-inwebo" set cert "XXXXXX" set entity-id "https://XXXXX.XXXXXX.fr/remote/saml/metadata" set single-sign-on-url "https://XXXXX.XXXXXX.fr/remote/saml/login" set single-logout-url "https://XXXXX.XXXXXX.fr/remote/saml/logout" set idp-entity-id "https://www.myinwebo.com/console/c/6990/saml2/14503/metadata" set idp-single-sign-on-url "https://www.myinwebo.com/console/c/6990/saml2/14503" set idp-single-logout-url "https://www.myinwebo.com/console/c/6990/saml2/14503/logout" set idp-cert "REMOTE_Cert_1" set user-name "Username" next end ```"XXXXXX"is the SSL certificate of the VPN-SSL"REMOTE_Cert_1"is the TrustBuilder IdP Certificate downloaded in TrustBuilder and imported in Fortigate.If you're using a port other than 443, add the port after the FQDN (for example vpn.entreprise.com:8443)
We use the following command
set user-name "Username"to retrieve the user-name.Usernameis a SAML attribute key you may define into a next step.You can also add a line to indicate that you need to retrieve a specific group name
set group-name "Groupname".Groupnameis a SAML attribute key you may define into a next step.
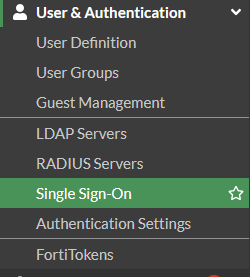
Go to “User & Authentication”
Select “Single Sign-on”
Create a new Single Sign-On configuration
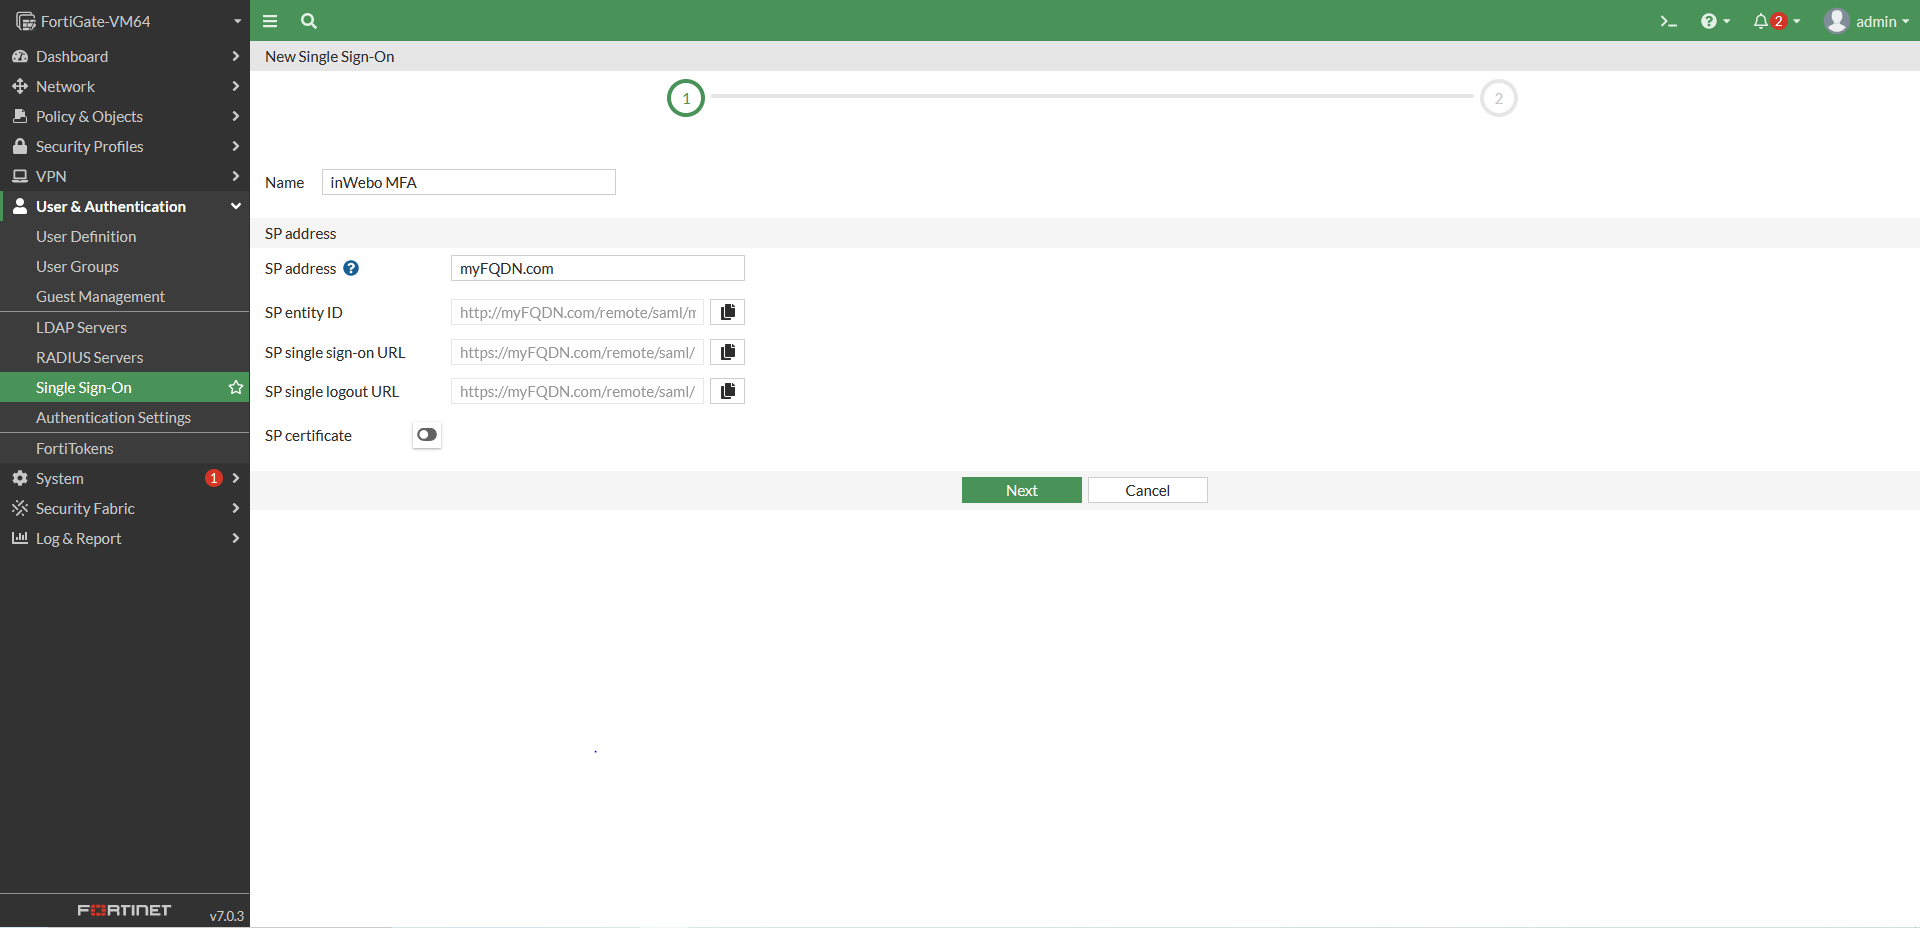
Give it a name
Add the IP of the FQDN of your Fortigate server (and the FQDN:PORT, if you are using a specific port)
Click on Next
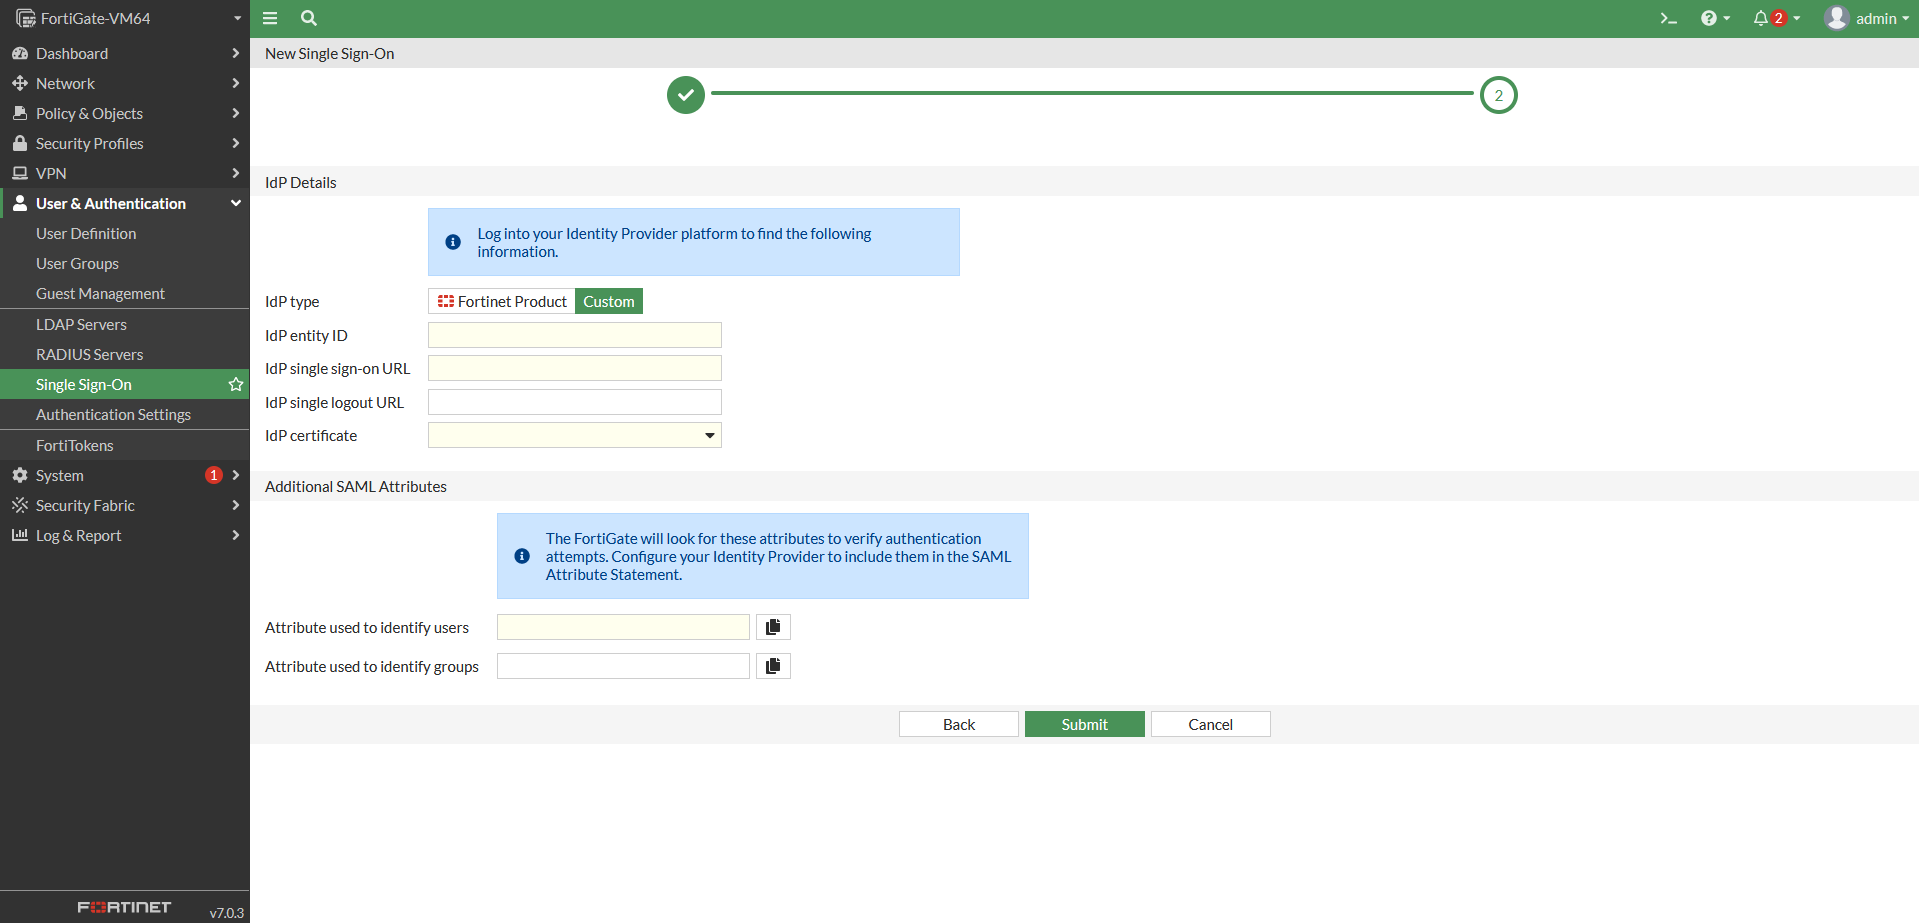
In the IdP configuration page, select “Custom” as a IdP type

Copy/paste the IdP metadata to this Fortigate page:
retrieve TrustBuilder IdP metadata (in your Fortigate SAML connector in TrustBuilder administration console) to find these url:
Paste the URL in the Fortigate page:
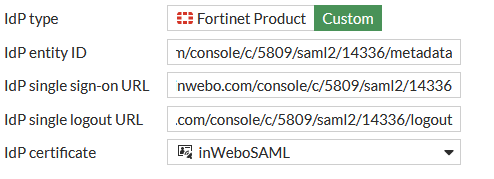
in “IdP entity ID”, paste the Issuer URL
in “IdP single sign-on URL”, paste the Single Sign On URL
in “IdP single logout service URL”, paste the Single Logout Service URL
in “IdP certificate”, select the TrustBuilder (formerly inWebo) certificate you have imported previously
In the next section, you can decide the attribute you want to use.
Depending of your configuration you will need to change attributes into your TrustBuilder SAML connector. You will configure that into a next step.
You can also define a attribute to identify groups. You will configure it as well into your TrustBuilder SAML connector. Fortigate will wait for this information to be provided by the IdP response.
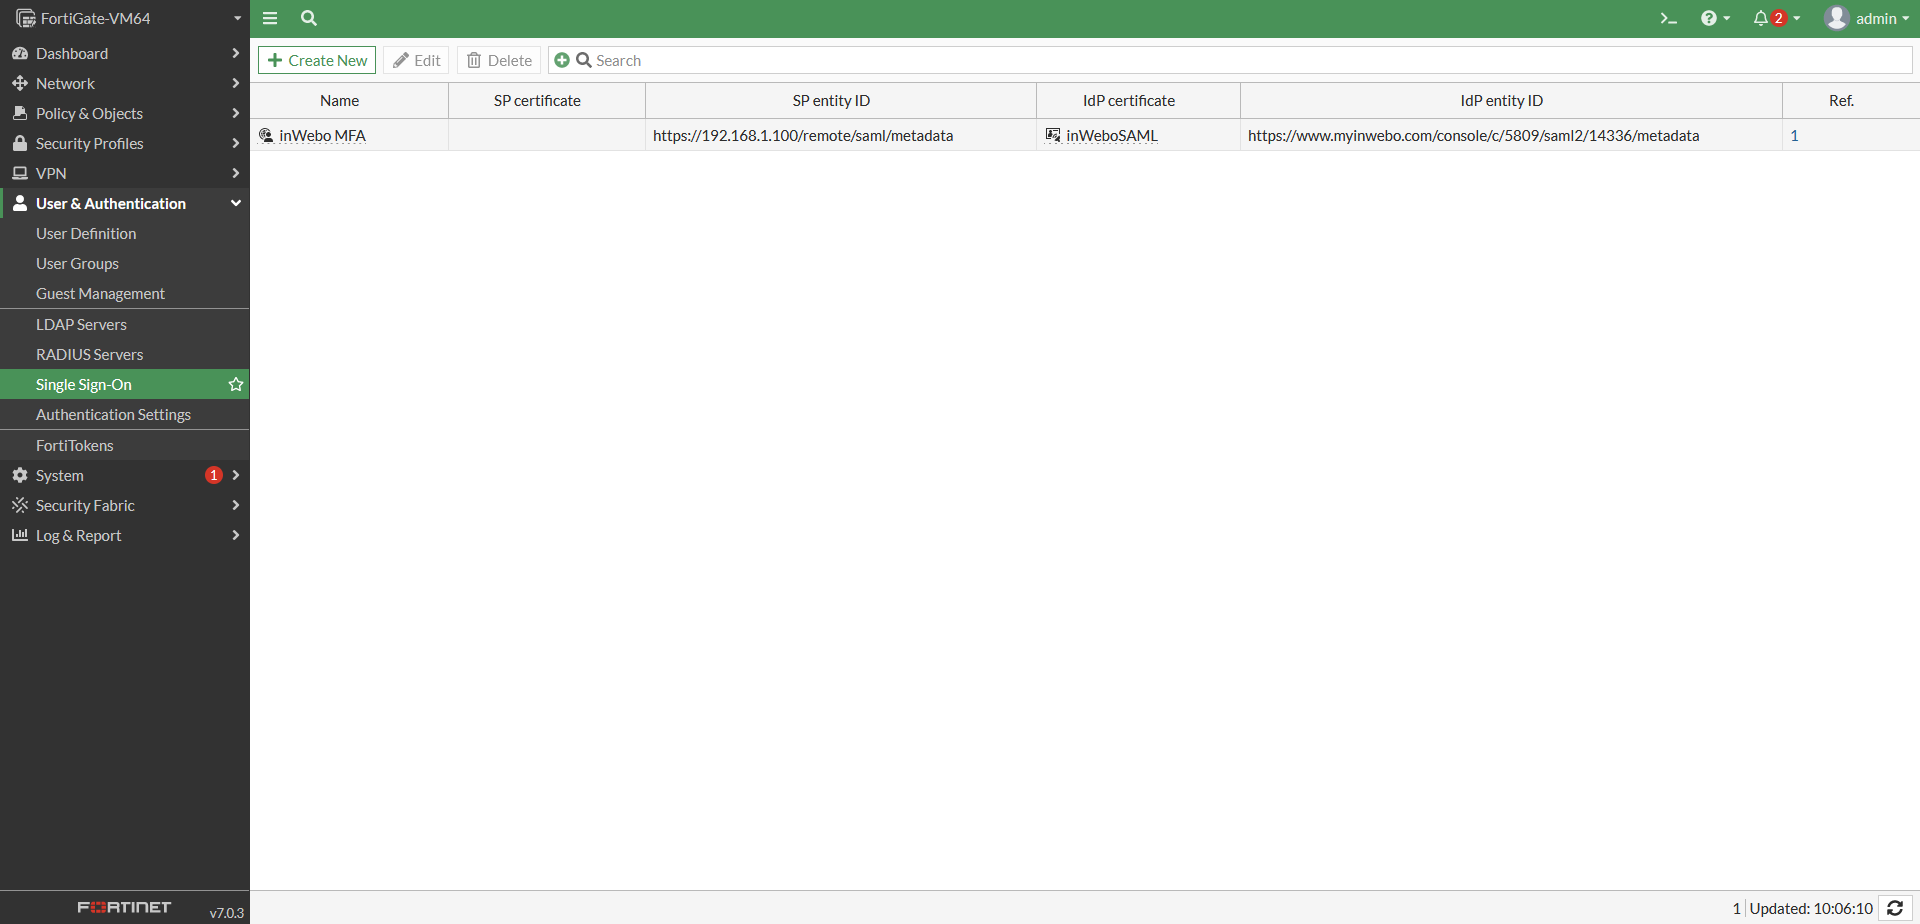
Click on “Submit” to validate.
Step 5: Provide Fortigate SP metadata & attributes to TrustBuilder
You should finalize the SAML connector configuration into the TrustBuilder administration console.
In Fortigate, make sure to complete the following metadata with your Fortigate URL:
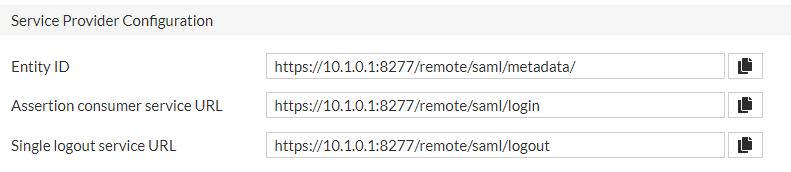
URL generated by Fortigate may contain errors. Please, correct them before proceeding to the next step:
The Assertion consumer service URL should end by /remote/saml/login
The Single logout service URL should end by /remote/saml/logout
Copy and paste the URL inside this metadata.
CODE<?xml version="1.0" encoding="UTF-8"?> <md:EntityDescriptor xmlns:md="urn:oasis:names:tc:SAML:2.0:metadata" entityID="FORTIGATE SP Entity ID URL"> <md:SPSSODescriptor AuthnRequestsSigned="false" WantAssertionsSigned="true" protocolSupportEnumeration="urn:oasis:names:tc:SAML:2.0:protocol"> <md:SingleLogoutService Binding="urn:oasis:names:tc:SAML:2.0:bindings:HTTP-POST" Location="FORTIGATE SP single logout URL"></md:SingleLogoutService> <md:AssertionConsumerService Binding="urn:oasis:names:tc:SAML:2.0:bindings:HTTP-POST" Location="FORTIGATE SP single sign-on URL" index="0" isDefault="true"></md:AssertionConsumerService> </md:SPSSODescriptor> </md:EntityDescriptor>Go to your SAML connector in the TrustBuilder administration console.
“Service provider (SP) Metadata” section, paste the Fortigate Service Provider (SP) metadata.
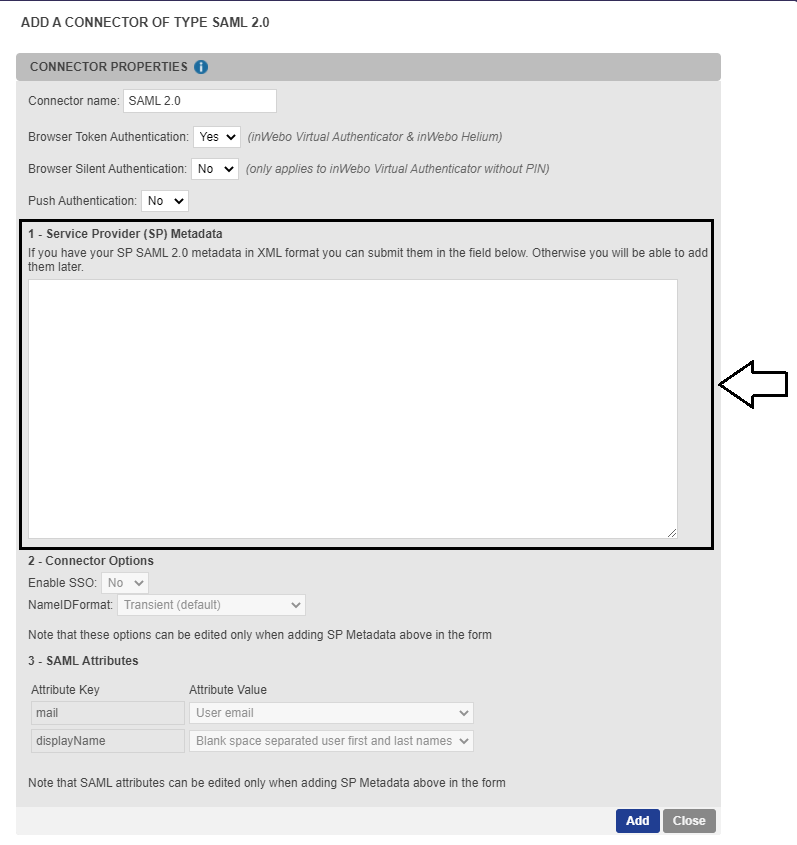
In the “SAML Attributes” section, configure the relevant attribute compare to your configuration into the Fortigate. For example if you are using a specific attribute as uid, or a group, you will need to configure it.

To match one of our previous example for Fortigate 6.4 configuration, you can define an attribute key “Username” with an attribute value User login.
You can also add an attribute key “Groupname” with an attribute value User groups. This configuration may be done to retrieve the user's group from TrustBuilder and automatically assign the appropriate rights on the VPN for example.
To offer a better user experience to your users, set the “Push Authentication” setting to Yes. This option enables your user to receive notifications on their mobile or desktop token to automatically generate an OTP.

Click on Update to save the connector.
Step 6: Fortigate apply this new policy
Depending of your configuration and its complexity this procedure may be different but the idea is the same : you should apply to your VPN this new Single Sign On authentication mechanism.
Please, click to see the details for your Fortigate version.
Create a group for SAML authentication
Run the following CLI commands to move all your TrustBuilder MFA users into the “grp-saml” group:
CODE```fgt config user group edit "grp-saml" set member "saml-inwebo" next end ```To create several groups, you can run the following command lines:
CODE```fgt config user group edit "grp-saml-IT" set member "saml-inwebo" config match edit 1 set server-name "saml-inwebo" set group-name "IT" next end next edit "grp-saml-standard" set member "saml-inwebo" config match edit 1 set server-name "saml-inwebo" set group-name "standard" next end next edit "grp-saml" set member "saml-inwebo" next end ```In this example, we have created two groups,
grp-saml-ITandgrp-saml-standard, which correspond to the IT and standard groups we would have created in TrustBuilder.
Update your VPN Settings
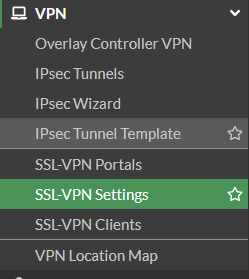
Go to VPN → SSL-VPN Settings
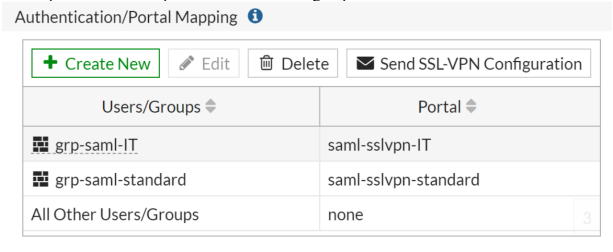
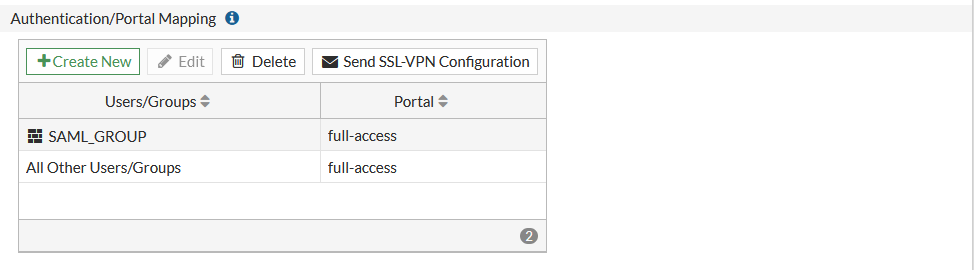
Add your SAML group into the “Authentication/Portal Mapping” to the relevant “Portal” depending of your configuration
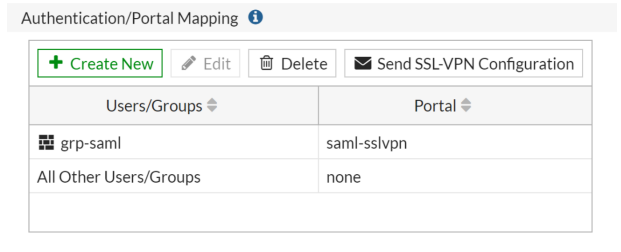
For this example, we created a “saml-vpn” portal.
Note that if you only have SAML authentication, the VPN login interface will redirect to TrustBuilder MFA.If your configuration is made with several groups, you should have 2 portals based on the TrustBuilder groups.
Update your firewall policy
Go to “Policy & Objects” > “Firewall Policy” to add the group into the relevant policy depending of your configuration.
Add a rule from the SSL-VPN interface to another interface.

In the source, be sure to set the VPN client IP range and group.
Here the object automatically created “SSLVPN_TUNNEL_ADDR1” and the group “grp-saml”.If your configuration is made with several groups, you can assign rules according to groups.
The "grp-saml" group can always be used to refer to all Inwebo users
TrustBuilder MFA users (even if they don't belong to the IT or standard groups).
Create a group for SAML authentication
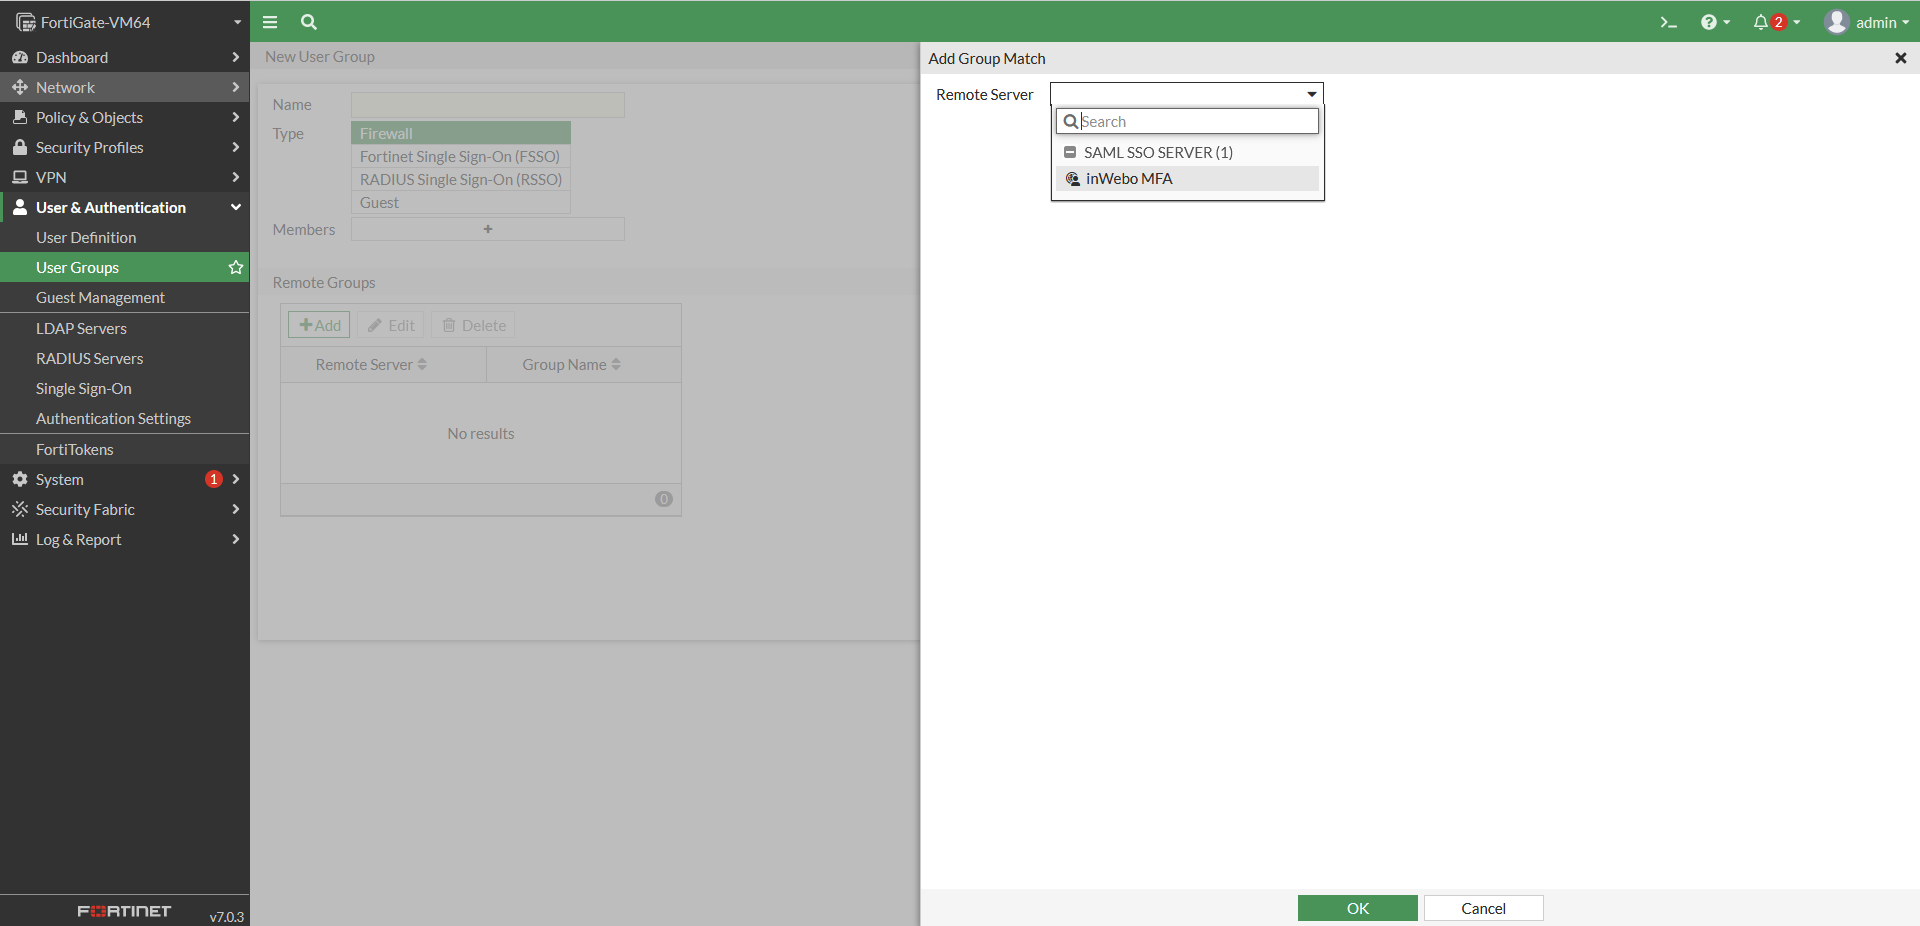
Go to ”User Groups”
Create a new Group by selecting the “Remote Server” with the “Single Sign On authentication” you have created and add your “Members” within this group

Update your VPN Settings
Go to VPN → SSL-VPN Settings
Add your SAML group into the “Authentication/Portal Mapping” to the relevant “Portal” depending of your configuration
Update your firewall policy
Go to “Policy & Objects” > “Firewall Policy” to add the group into the relevant policy depending of your configuration.
Add the SAML group into the Source authorized of your Policy

Authenticating in Fortigate through a browser
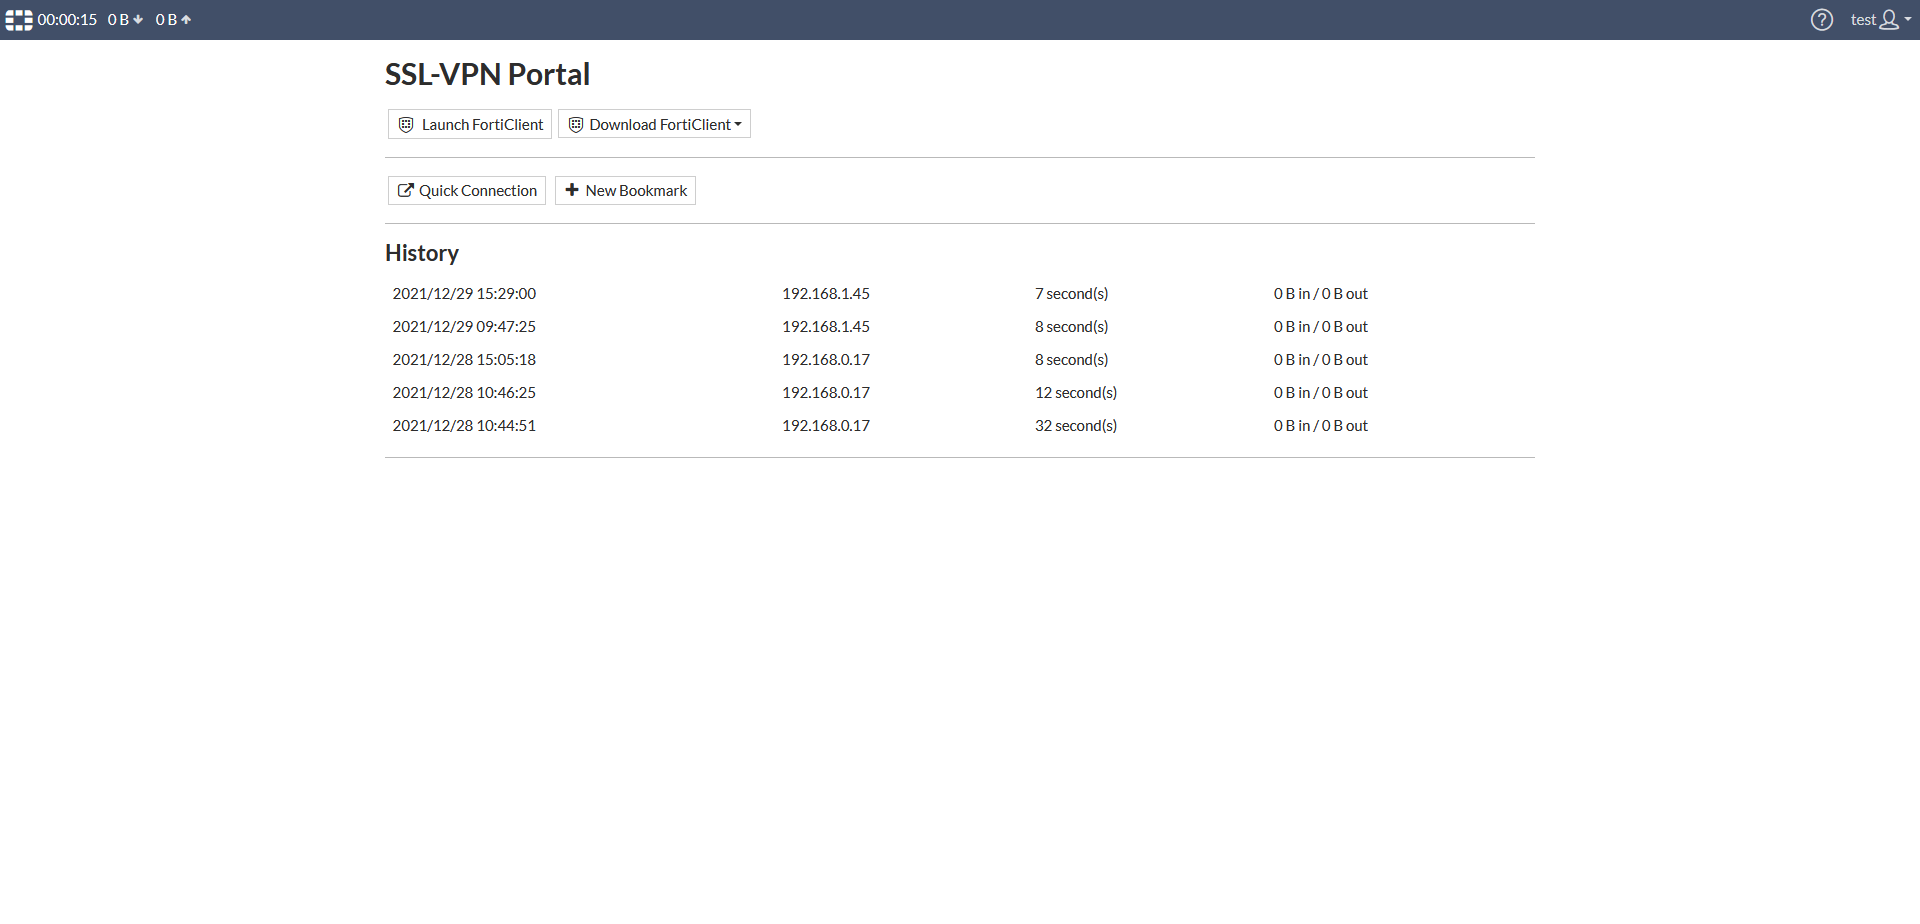
You can now go into your Fortigate portal url to see the result:
The Single Sign-On link is available
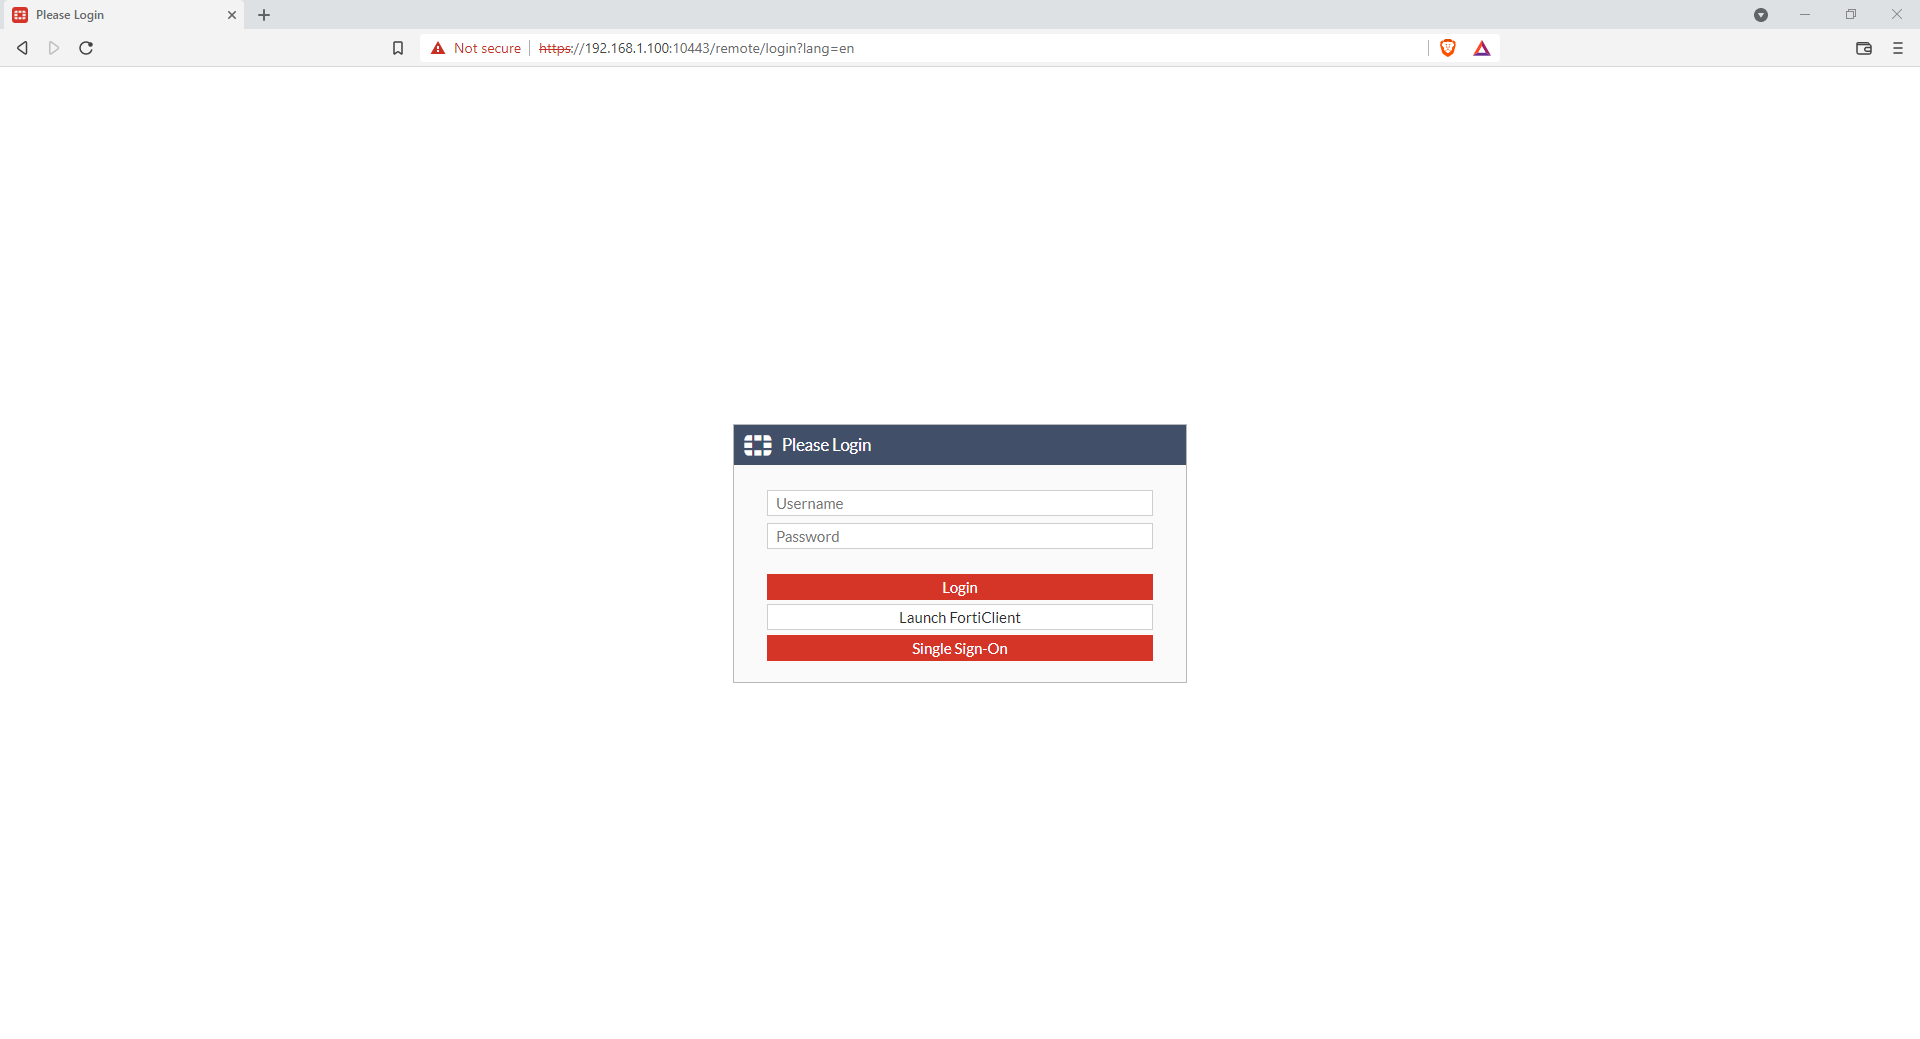
When you click on it, you will have a SAML redirection to inWebo that will perform the strong authentication
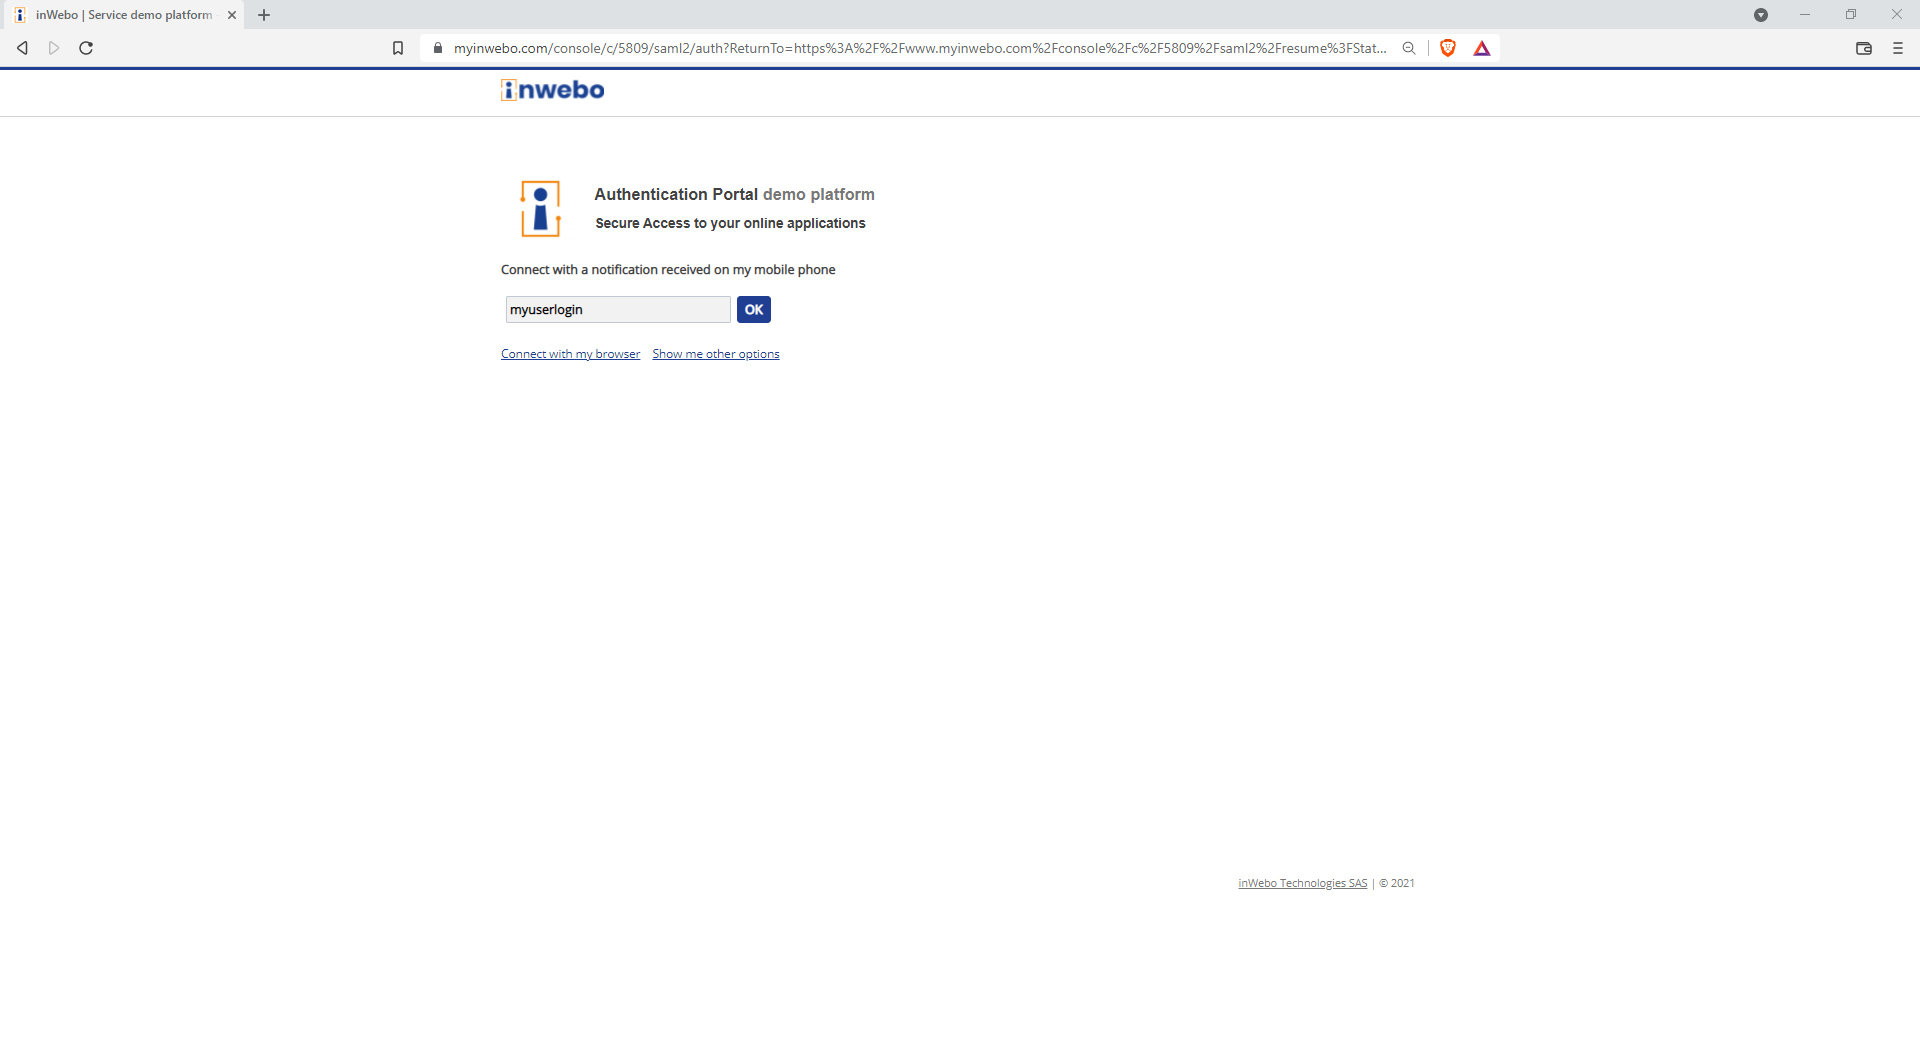
if the browser is not an enrolled token, you will be able to perform a push on a mobile or desktop token.
if the browser is an enrolled token, you will be able to authenticate directly.
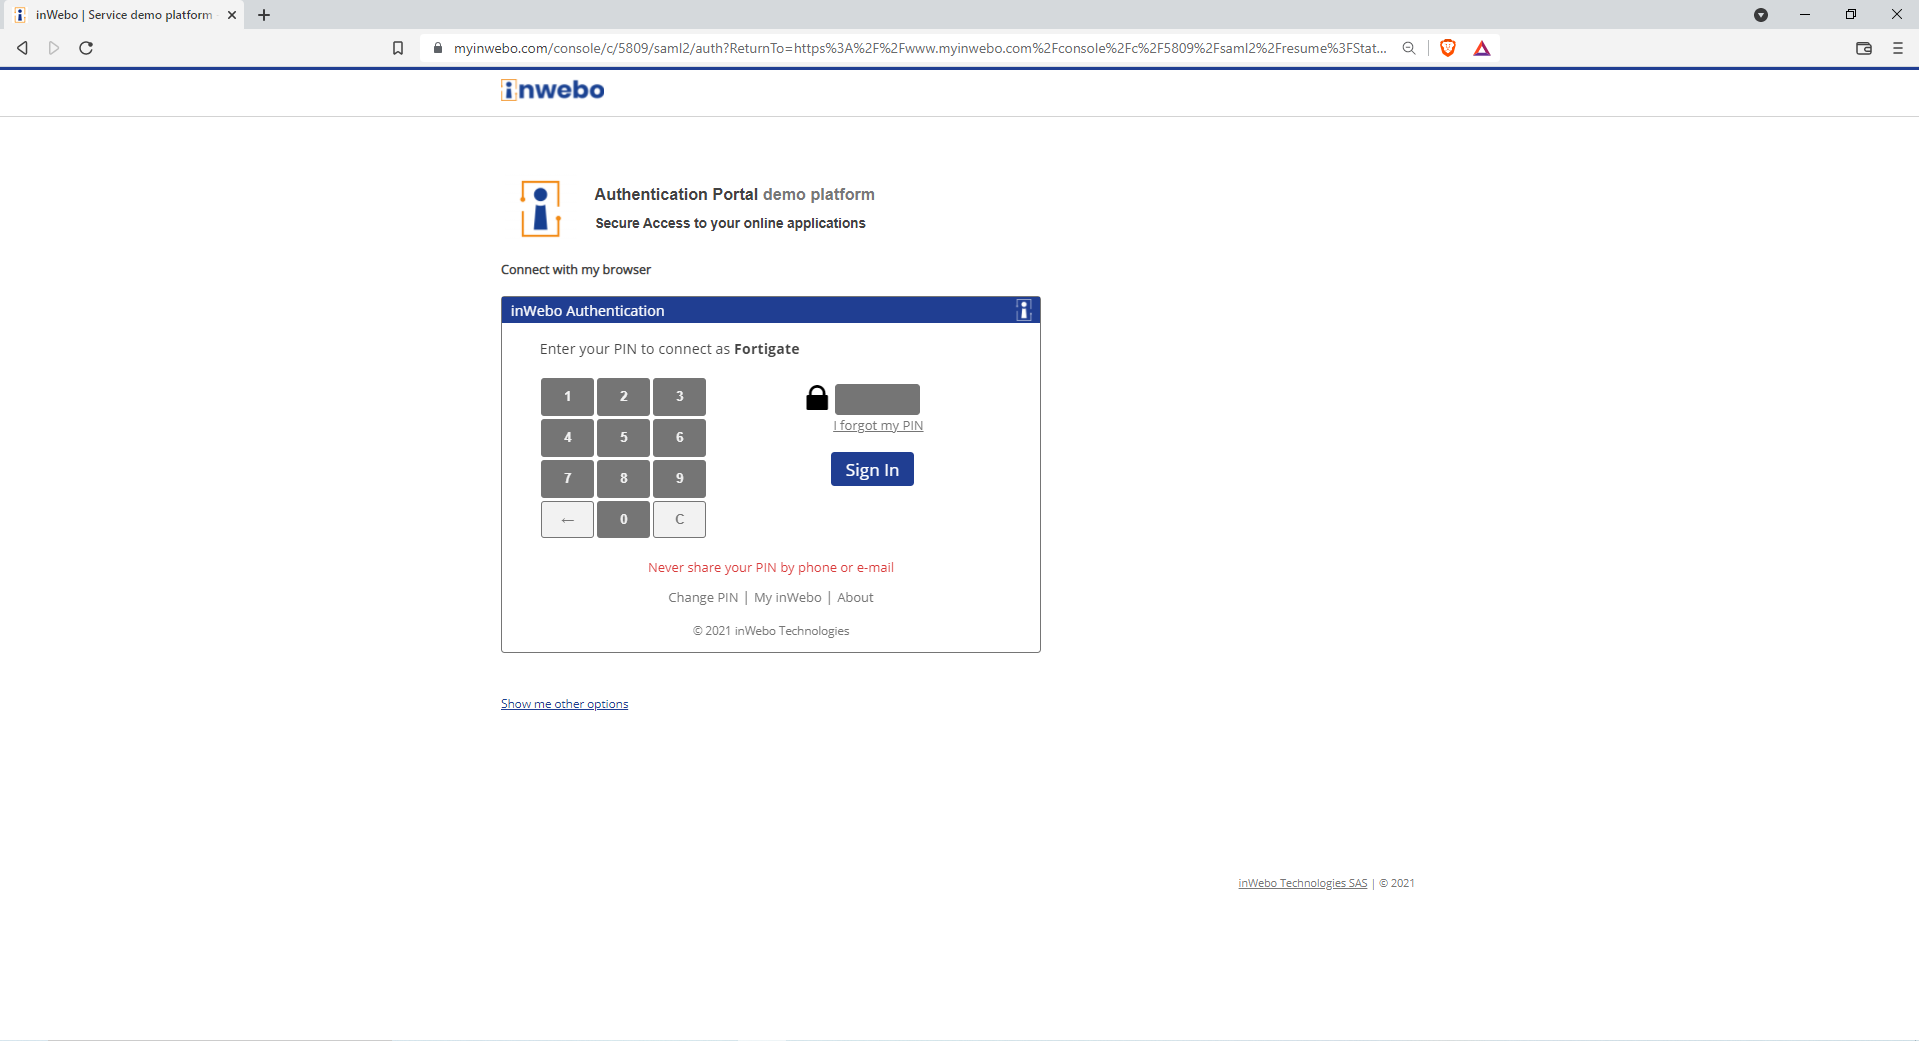
Then after the strong authentication, you are connected.
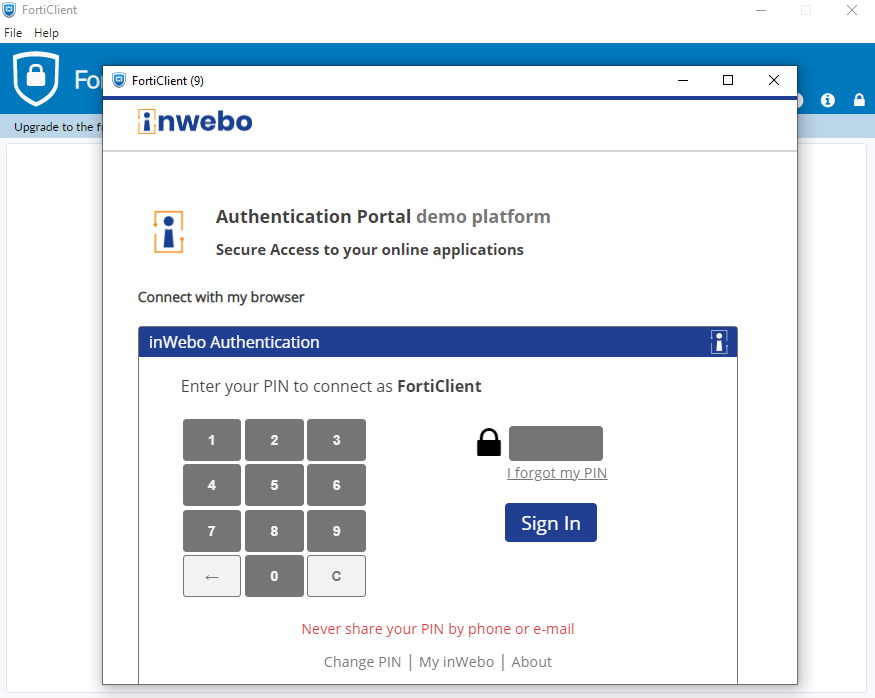
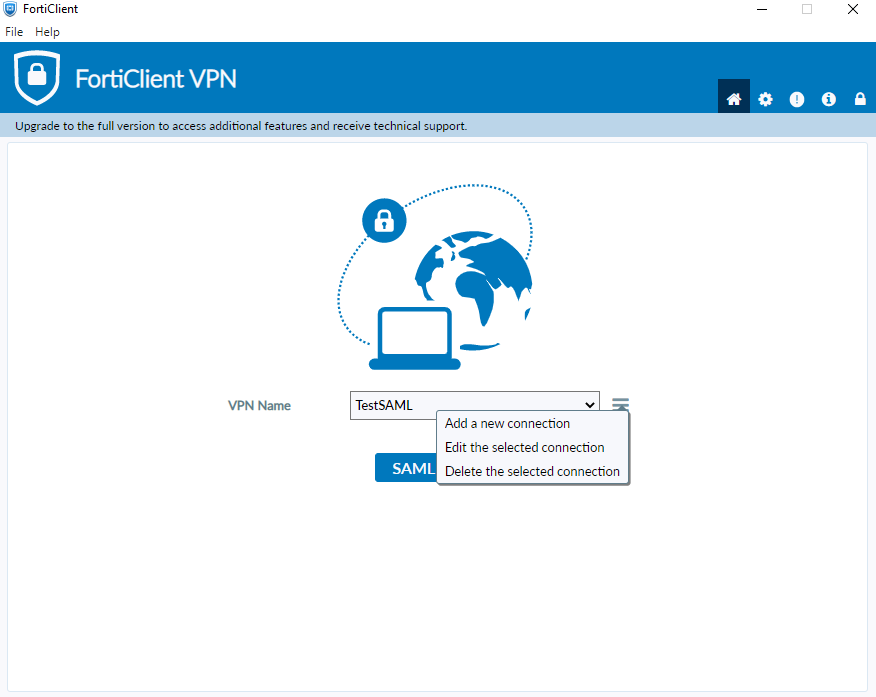
Authenticating in Fortigate through a FortiClient
By default the FortiClient is not taking into account the Single Sign On authentication.
You will need to activate the Single Sign on into your FortiClient.
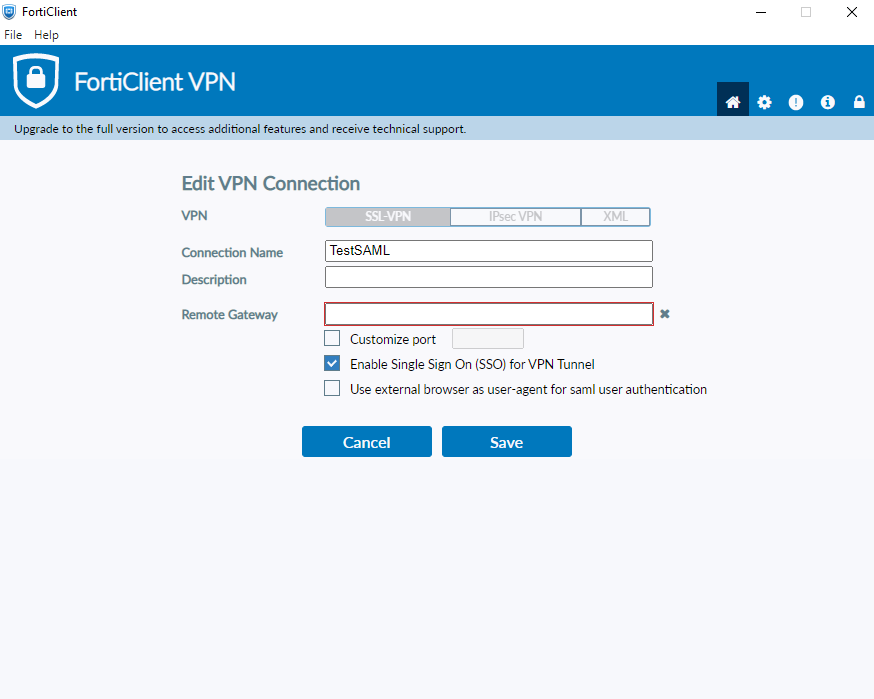
Edit or add a new connection
Select “Enable Single Sign On (SSO) for VPN Tunnel”
you can also “use external browser as user-agent for SAML user authentication” if you want to use the default browser of you PC and not an internal browser managed by the FortiClient
After the activation you can use the Single Sign On feature to authenticate with inWebo
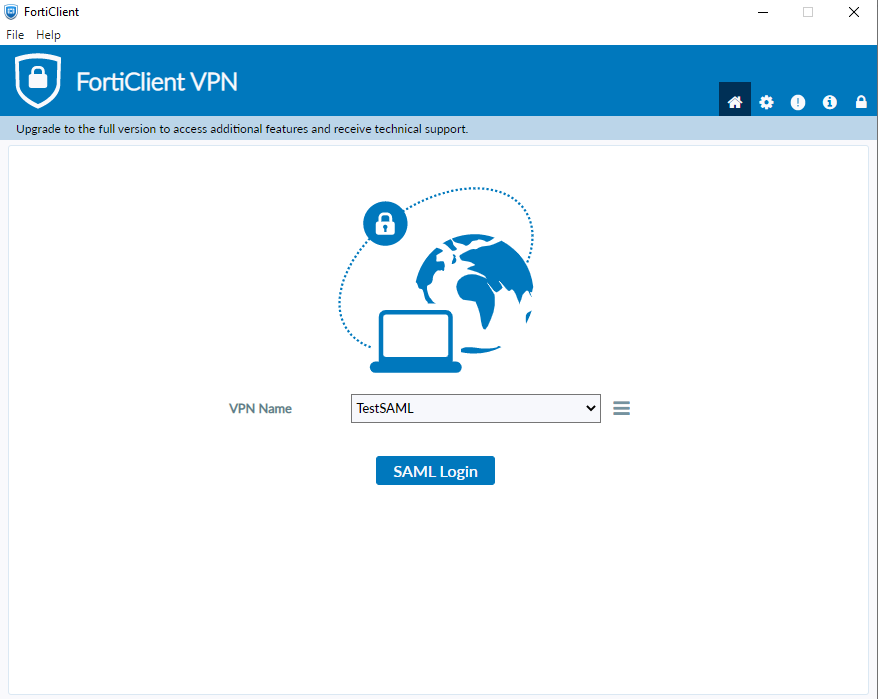
by using a mobile or desktop token through a notification
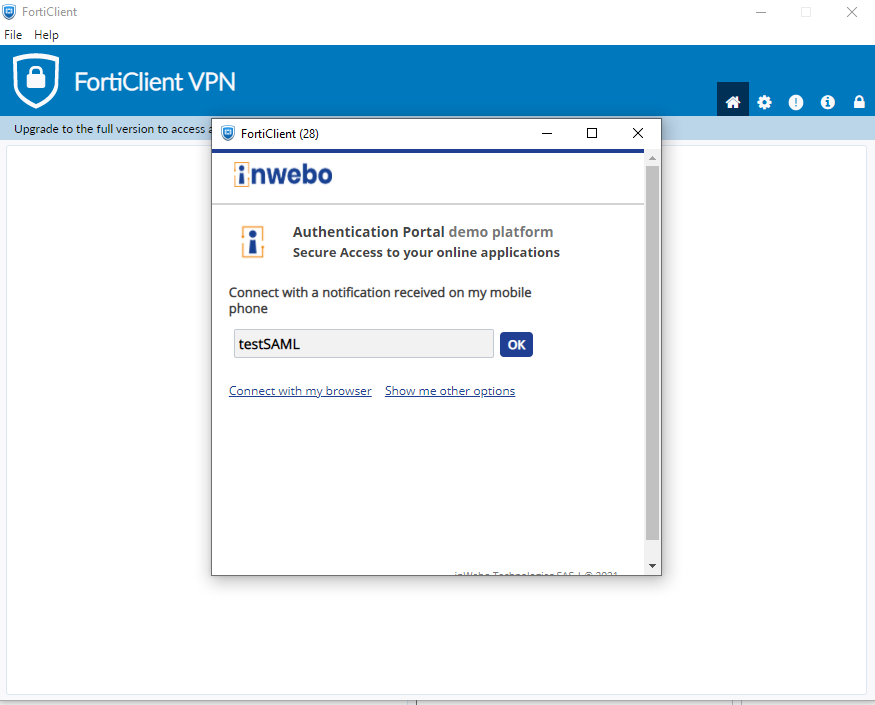
by activating the browser within the FortiClient and then you can use directly the FortiClient as a token to authenticate