Evidian Web Access Manager (WAM) SAML v2 configuration
This document describes how to configure interoperability between the inWebo service authentication platform and the on-premise Evidian Web Access Manager (WAM), using standard SAML V2 capabilities.
Materials from both vendors are being used solely for the purpose of making instructions clear. Screen images and content obtained from Evidian and Inwebo solutions belong to the current versions (2020), they are not contractual and subject to changes without prior notice from Evidian and Inwebo.
This document describes how to:
Deploy multi-factor authentication (MFA) options in Evidian Web Access Manager (WAM) using Inwebo IDP (Identity Provider)
Configure SAML authentication in Evidian Web Access Manager (WAM) using Inwebo as an identity provider.
It is assumed that the Evidian Web Access Manager (WAM) environment is already configured and working with static passwords prior to implementing multi-factor authentication using Inwebo Authentication Service.
Evidian Web Access Manager (WAM) can be configured to support multi-factor authentication in several modes. The SAML authentication will be used for the purpose of working with Inwebo IDP.
WAM configuration
Prerequisites
To enable inWebo IDP (Identity Provider) to receive SAML authentication requests from Evidian Web Access Manager (WAM), the following prerequisite tasks must also be completed:
Ensure the prerequisites required for installing the Evidian Web Access Manager (WAM) components are met. Refer to the following link: http://support.evidian.com
Install the following: last Evidian WAM 9. version
Federation License is uploaded in Evidian WAM for Federated Authentication
Have an account in inWebo for testing
Verify that end-users could connect to WAM using password authentication
To configure the SAML integration with inWebo, you need to have access to WAM administration console with a user with administrator profile.
Certificate
Web Access Manager Authentication Server acts as a SAML assertion provider in inter-domain SSO and requires a certificate to sign the SAML assertions.
You should use a certificate coming from a Certificate Authority for a production system.
You need to setup one signing certificate for SAML assertions and one server certificate for the HTTPS connection.
For demo or evaluation purpose, you could use a self-signed certificate generated by the WAM administration console. See WAM administration guide for more details.
Declare a SAML Domain inWebo with Metadata
When WAM is configured as a Service Provider, WAM can exchange SAML messages with Identity Providers from other domains. You must declare the SAML domains that WAM has to interact with.
To declare a SAML domain:
In the Authentication tab, right-click the SAML Domains folder and select Declare a SAML Domain with Metadata.
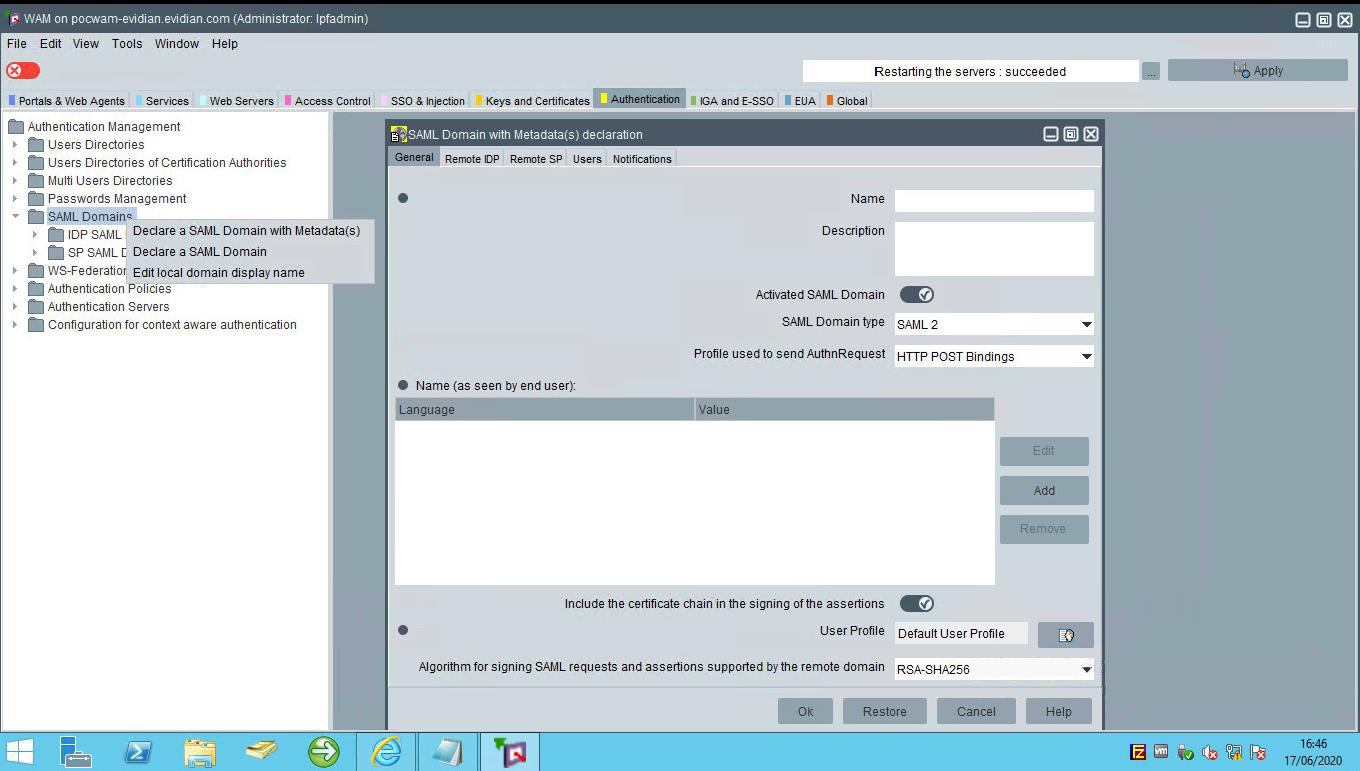
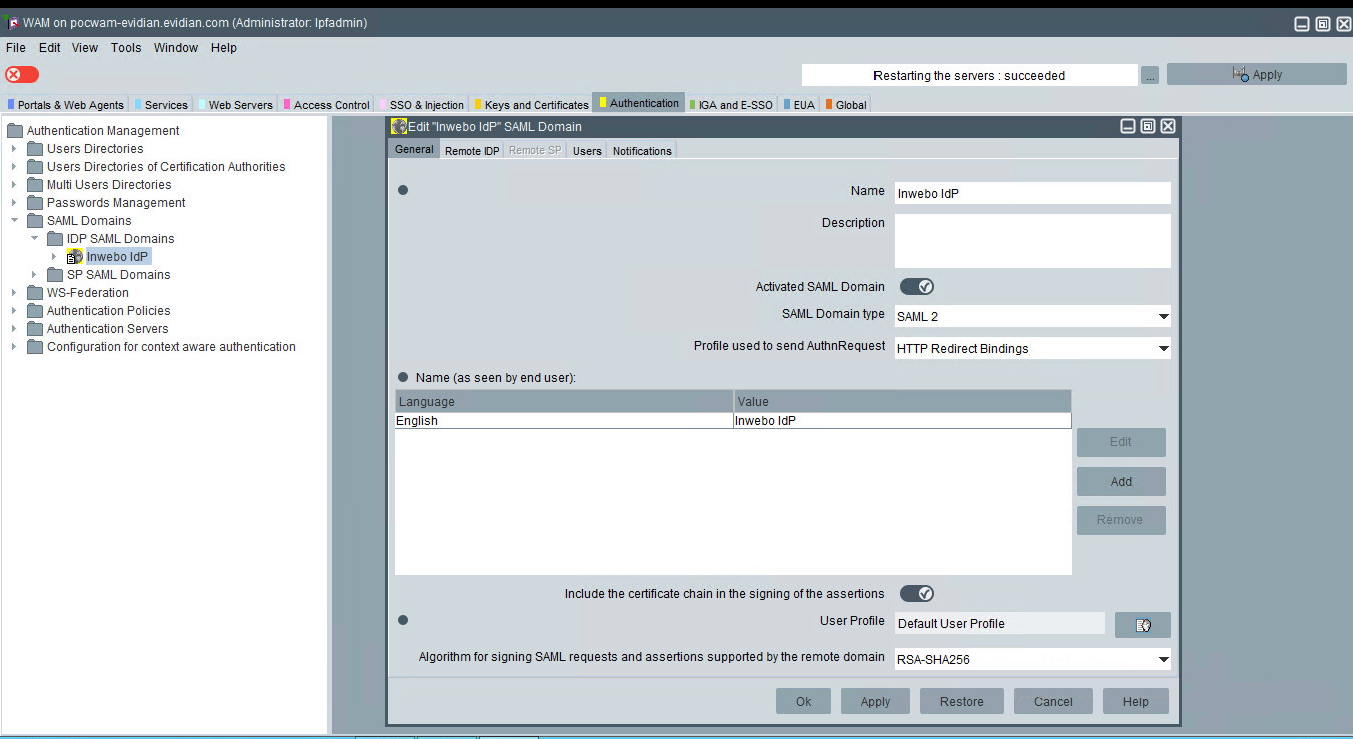
In the General Tab, Fill-in the fields as follows:
Name: provide a name (inWebo IDP in our example)
Activated SAML Domain: select this check box to enable this SAML domain.
SAML Domain type: Select SAML 2
Profile used to send AUTH Request: available only for SAML 2 Domain Type. This field defines how the authentication request is send to Identity Provider (IDP).
Select the profile: HTTP Redirect uses SAML 2 HTTP Redirect Binding
Name (as seen by end-user): Domain name as it is displayed for end-users, as in an SAML inter-domains authentication window, according to the language they use.
in the inWebo Administration console, in the "secure sites" tab
Add a SAML 2.0 connector in "connectors section".
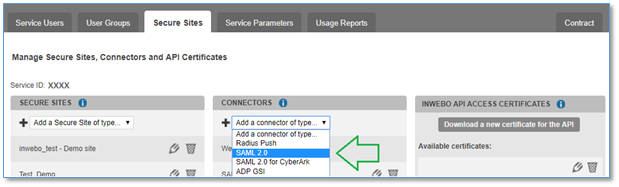
Ignore the “Service provider” configuration and click the ADD button to add the connector without any settings
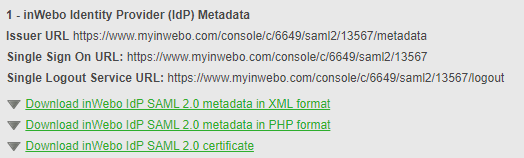
Download the inWebo IDP metadata by clicking on "Download inWebo IDP SAML 2.0 metadata in XML format"
Metadata of the IDP provider: paste the Metadata downloaded from the inWebo administration console
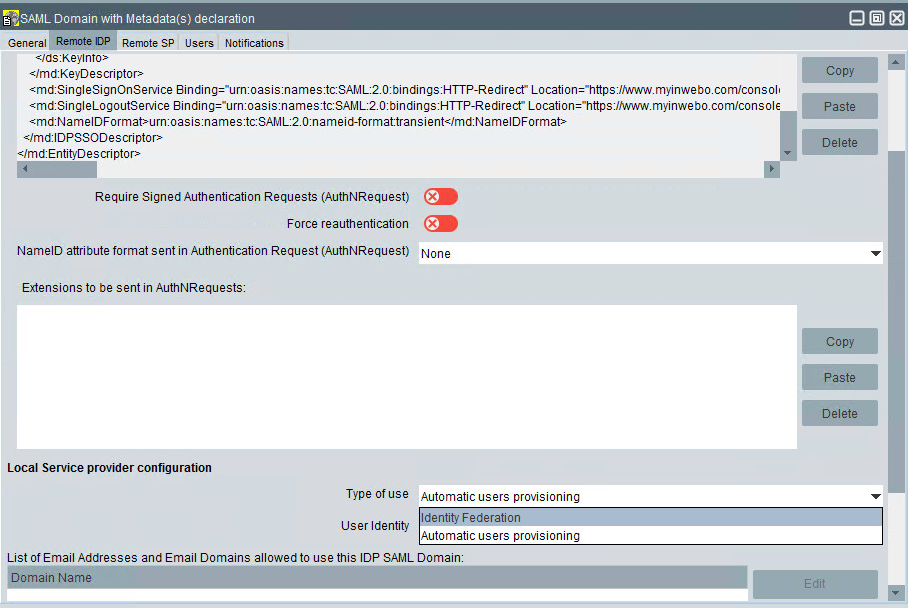
Type of use: select "Identity Federation"
User identity: Indicates where to find the user identity in the SAML assertion emitted by the Identity Provider of this domain: select "Subject (NameID)"
LDAP attribute for SAML federation: InWebo requires to select the "mail" attribute - Please note that it depends on your user directories (OpenLdap built-in directory in this example)
Domain Name: Optionally provide a list of email addresses or email domains. Only users with email addresses present in the list or with a domain matching one of the list are allowed to use the inWebo authentication. (domain "evidian.com" in our example)

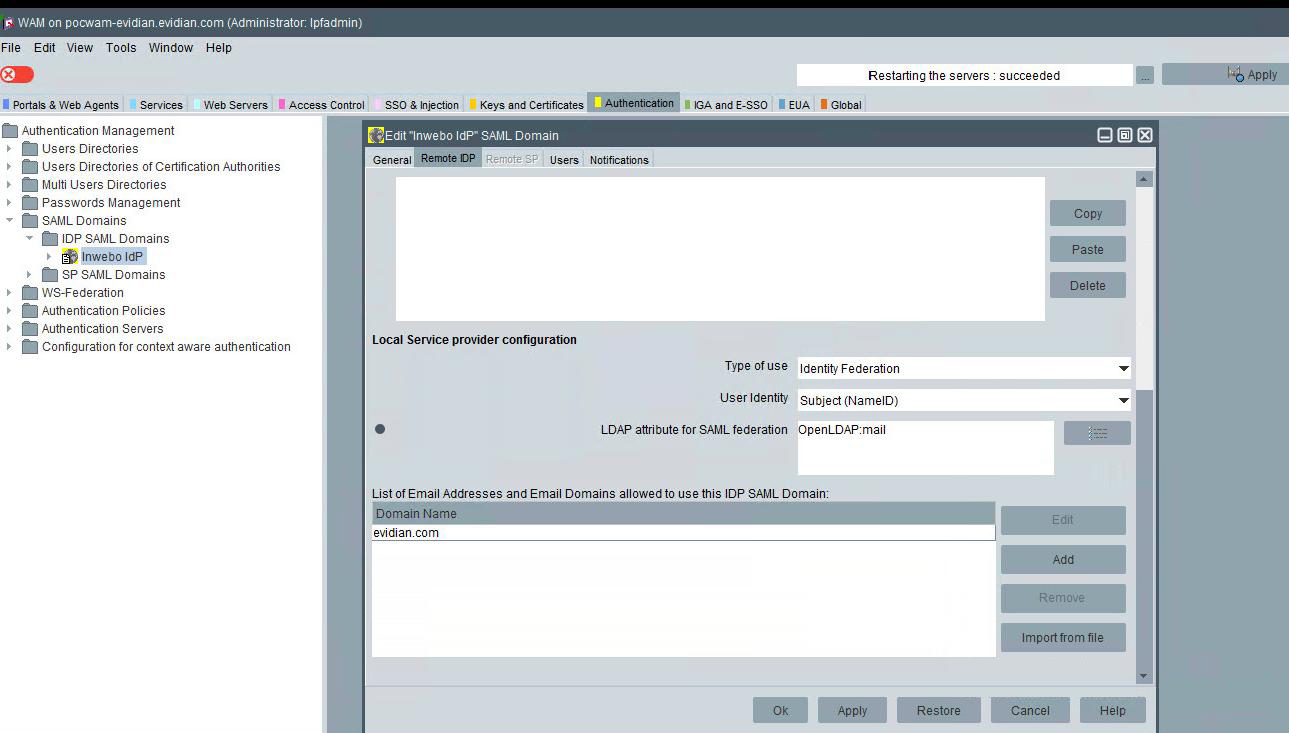
The inWebo SAML domain configuration is done.
Creating an Authentication Policy Object Dedicated to Inter-Domain SSO
In the Authentication tab, right-click Authentication policies, and select create Authentication policy
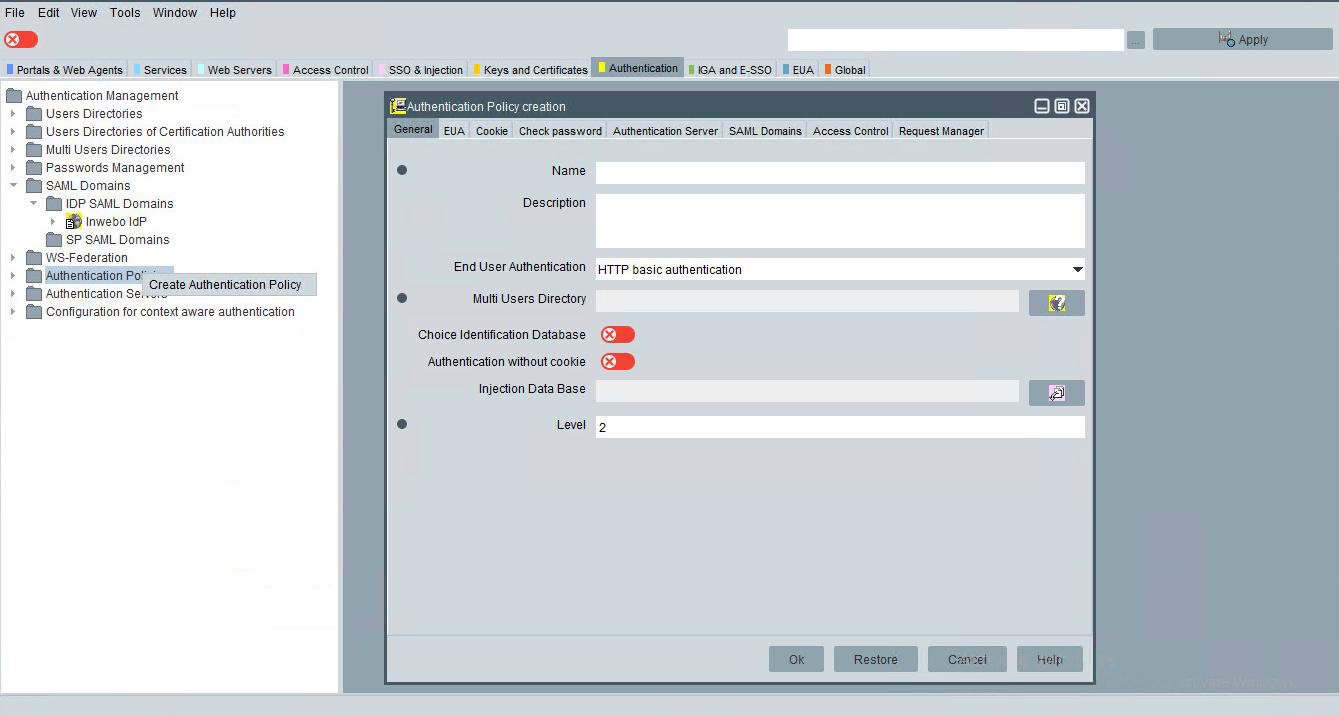
In General Tab:
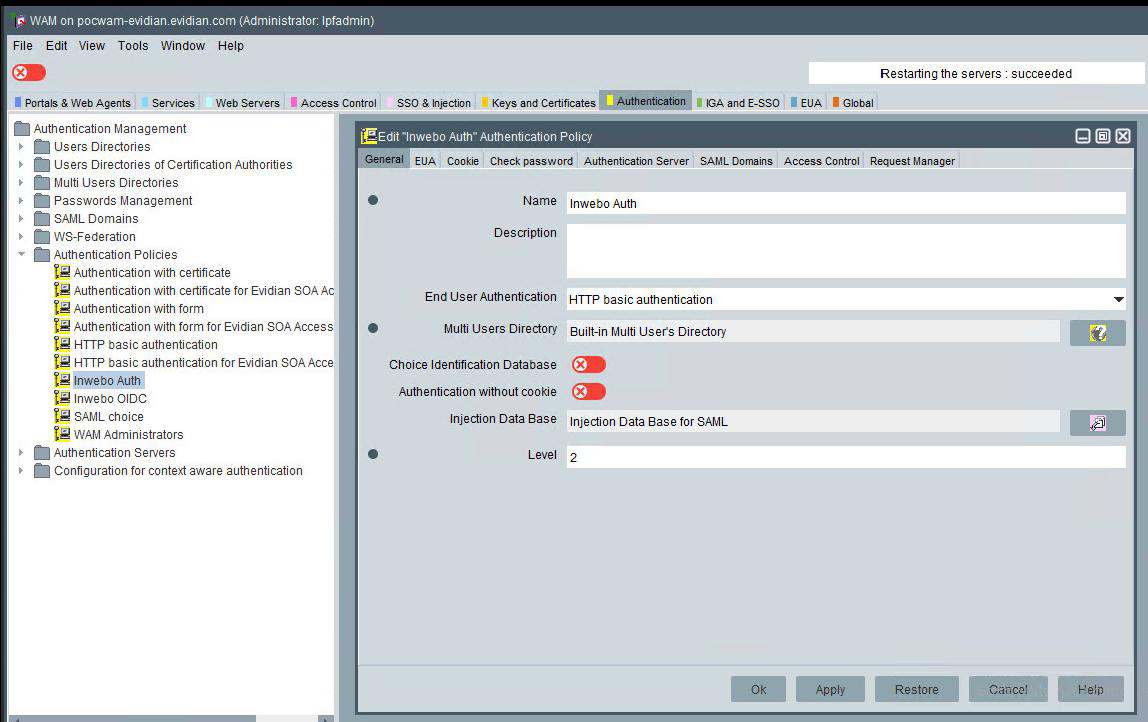
Enter the name of policy (InWebo Auth for example)
Enter short description
Select HTTP Basic authentication
Select your user directory (Built-In Multi User's Directory in our example)
Select the Injection Data Base for SAML. Injection data base is a way to configure how the user's attributes are mapped to SAML assertion's fields. For details, look at the Evidian Web Access Manager administrator's guide on how to tune Inject Data in WAM.
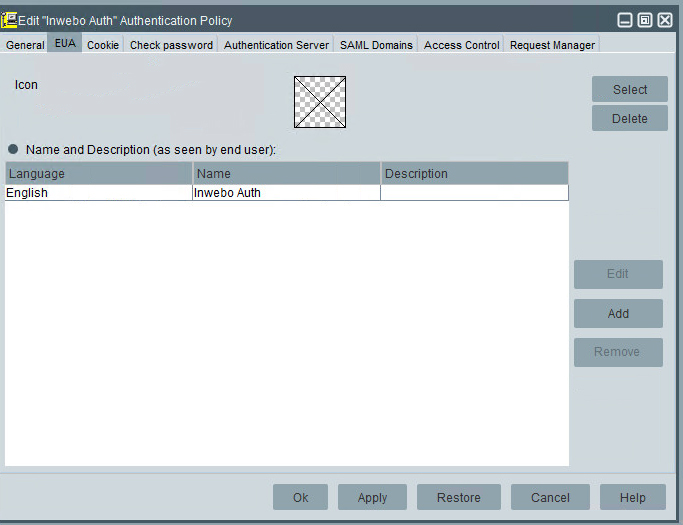
In EUA Tab
Select an Icon
Add a Name and description (as seen by end user) for at least one language
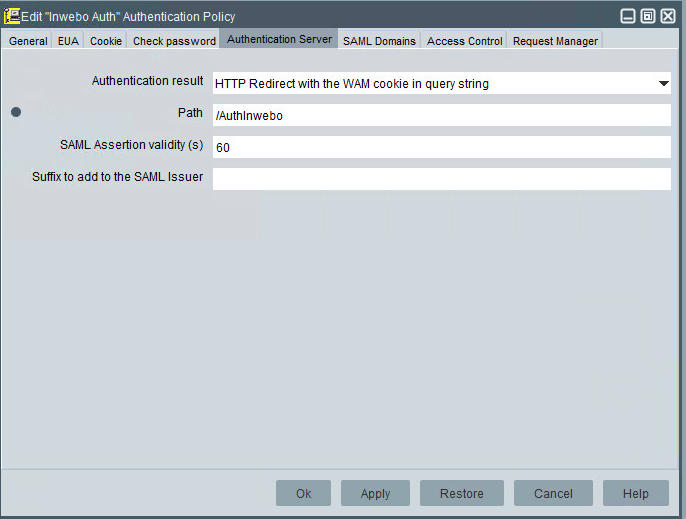
In the Authentication Server Tab
Select the Authentication result: HTTP Redirect with the WAM cookie in query string.
Choose a path from the root of the authentication server, which will constitute the URL from which inWebo authentication will be accessible. (If several authentication servers are declared in WAM, inWebo authentication will always be available from the same relative path)
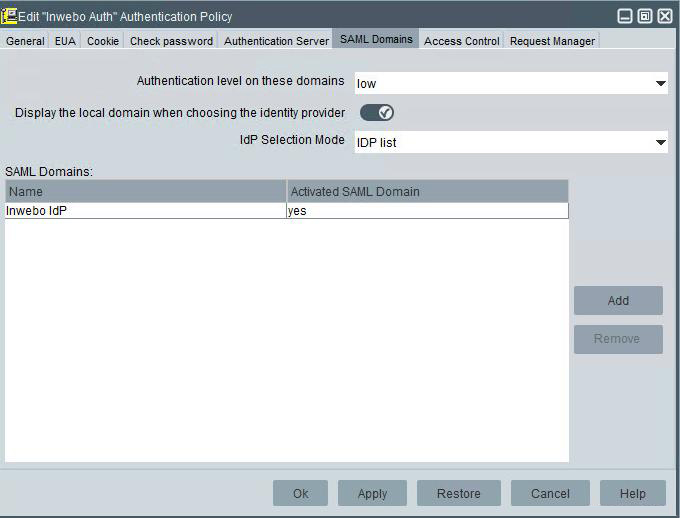
Click the SAML Domains tab and fill-in the fields as follows:
Authentication level on these domains: select the wanted authentication level
SAML Domains: link this authentication policy to the previously declared SAML domain.
The Authentication object for inWebo is now ready.
Declare an Authentication Server Dedicated to Inter-Domain SSO in WAM
In the Authentication tab right-click on WAM Authentication Server and Declare WAM Authentication Server
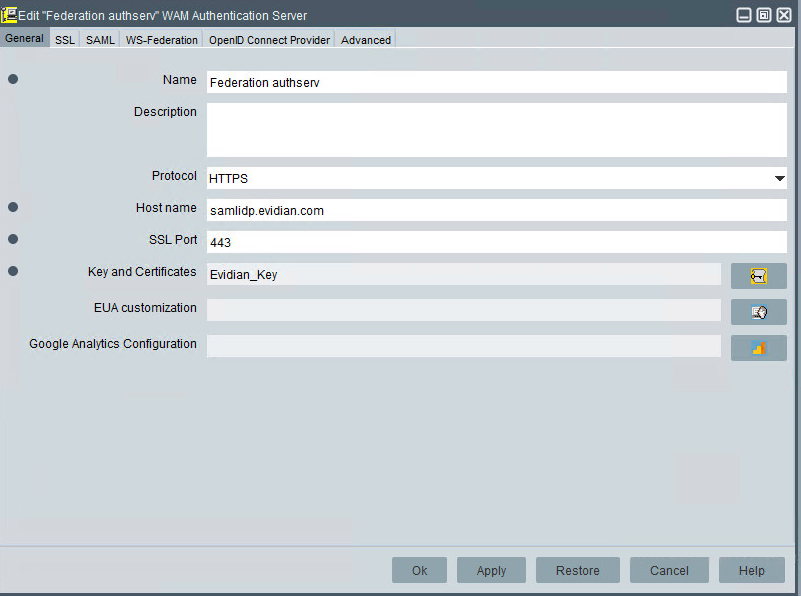
In the General Tab,
Enter a name for the authentication server
Select the HTTPS protocol
Fill the host name with the WAM server hostname
Select the Key and Certificates in the list
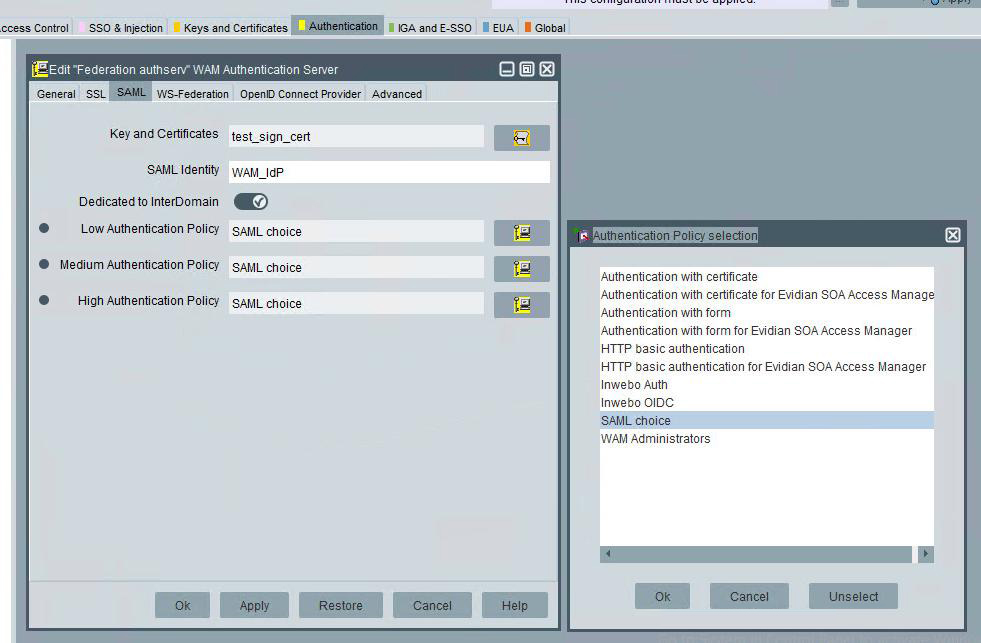
In the SAML tab, configure the WAM Authentication Server to generate SAML assertions, dedicated to Inter-Domain
Key and Certificates: Object Signing Certificate used to sign SAML assertions returned by the WAM Authentication Server. Select your Key and Certificates in the list.
SAML Identity: : this value is used as the "Issuer" field of a SAML Authentication request and the "Resource" field of a SAML Attributes Request.
Dedicated to InterDomain check box: if checked this authentication server will be dedicated to authentication to SAML Service Providers (as opposed as OpenID Connect clients or traditional applications for instance) and will allow each Service Provider to enforce one authentication policy among three possible : Low, Medium and High.
Of course, in this case you must configure one of these policies to be inWebo authentication or a choice authentication containing inWebo authentication (see "Evidian Web Access Manager administrator's guide" for details about choice authentication policies).
In the navigation panel right click on the configured authentication server object and select deploy.
The Authentication Server is now configured.
Retrieving the WAM Metadata
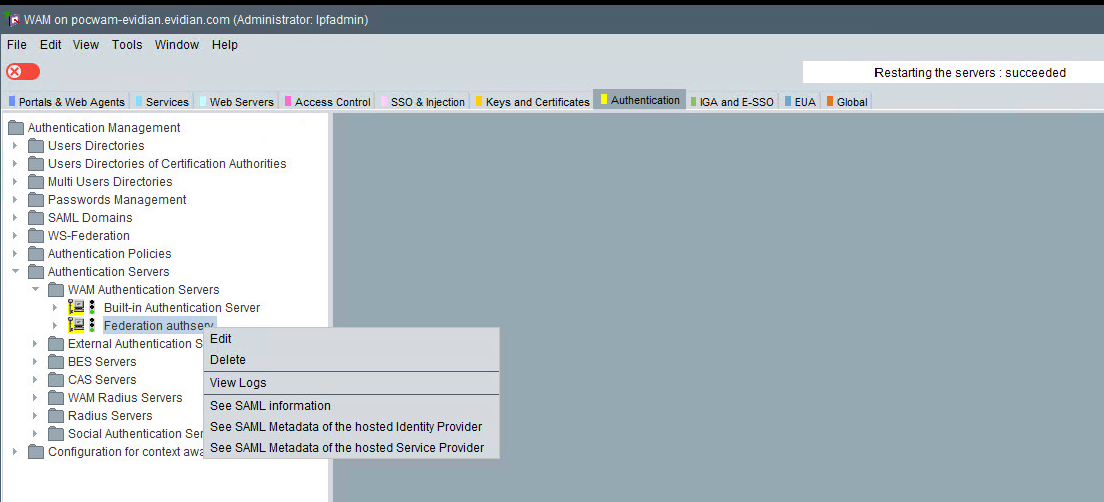
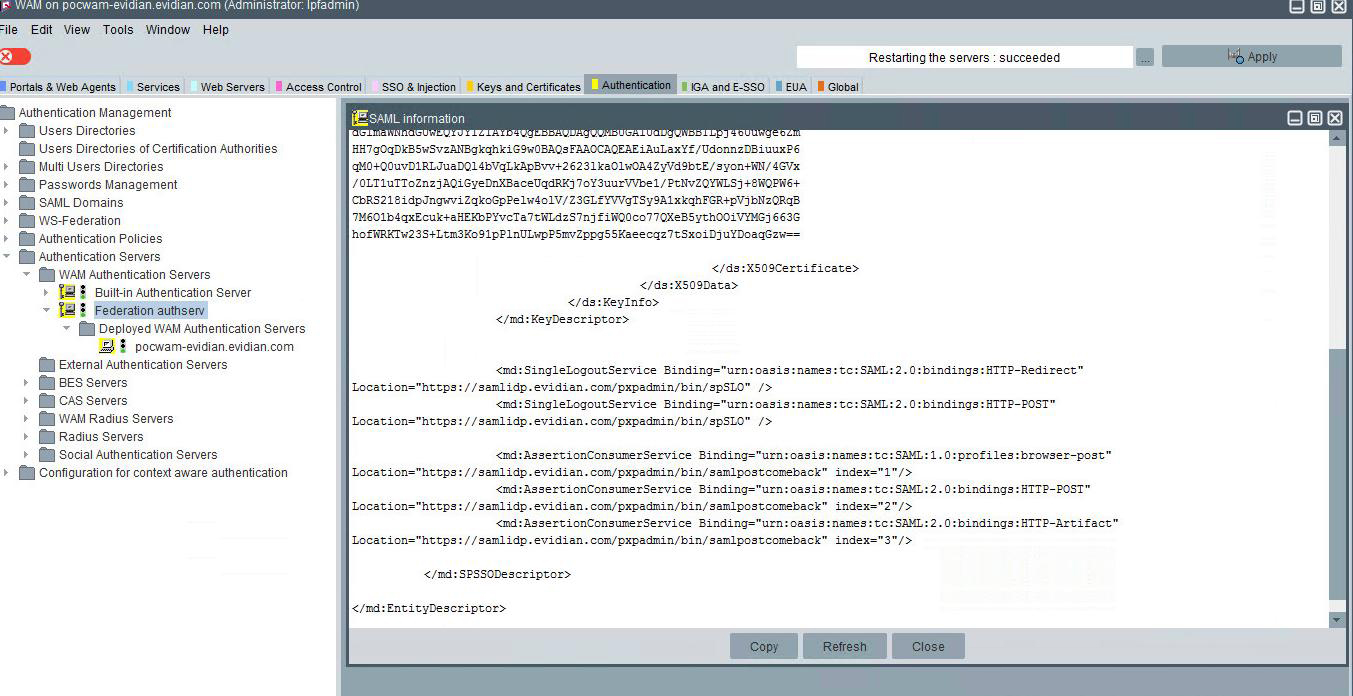
Next, you will need to retrieve SAML metadata for the Evidian WAM's authentication server you just configured in the previous steps.
To do that, right click on the corresponding authentication server object in the navigation panel and select See SAML Metadata of the hosted Service Provider.
At this point simply copy the metadata and paste it to the appropriate location in the inWebo admin console.
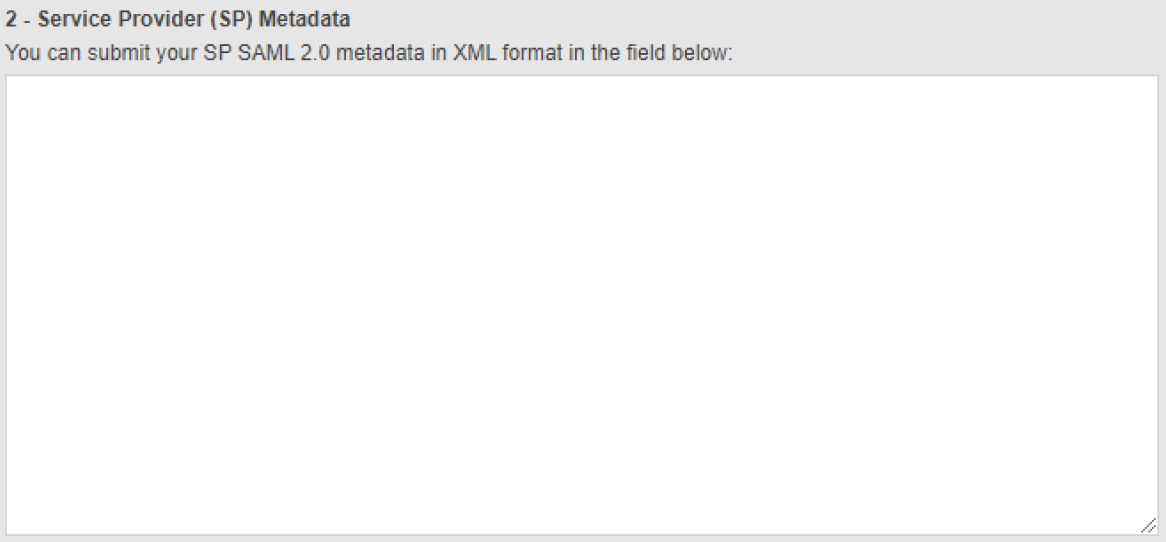
Edit the SAML connector in the inWebo administration console and paste the SAML metadata in section "2 - Service Provider (SP) Metadata" then save the configuration.
Finalize inWebo configuration
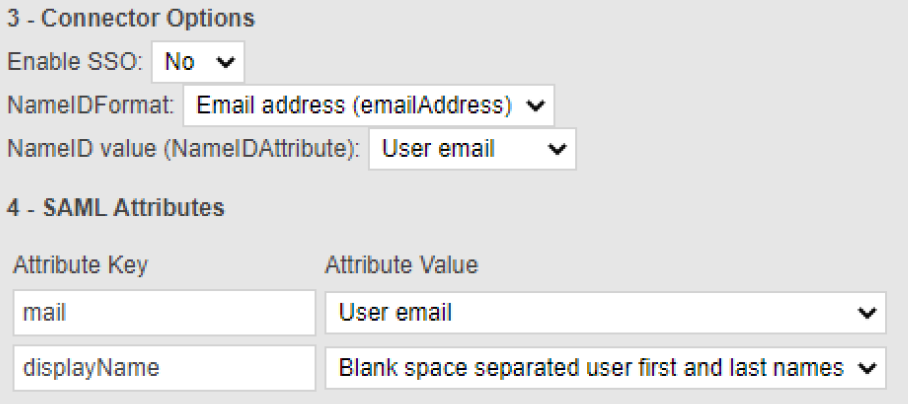
In section 3 - Connector Options of the SAML connector change the NameID Format to Email address and change the NameID value to User email.
Create an inWebo Secure Site
in the inWebo Administration in the "Secure Sites" tab and "SECURE SITES" section,
click "Add a Secure Site of type ..." and choose from the list the SAML 2.0 connector you just created.
Choose a name and verify that the "Called URL" is correctly indicating your "Evidian WAM Entity" address configured above.