BoostEdge, RADIUS integration
This is the procedure to integrate inWebo multi factor authentication service with "BoostEdge" Radius authentication.
Introduction
InWebo provides innovative, no-hardware, 100% SaaS, strong authentication solutions for employee and consumer secure transactions.
The purpose of this guide is to explain how to use InWebo products with BoostEdge, from ActivNetworks.
General Principles
InWebo strong authentication service supports many built-in interfaces such as Radius, SAML 2.0, Web Services API, Google Apps and many more. When working with a network device (firewall, reverse proxy,…) the preferred method is RADIUS. This is what we will explain further in this document.
Architecture is described below:
Users can download and manage InWebo tokens by themselves. In order to get the whole system up and running, your company system administrator only has to:
Add a new “authentication” service in BoostEdge (5 min)
Configure your existing service with Radius authentication (1 min)
Create an InWebo account (2 min)
Download, install and activate one of InWebo tokens (4 min)
Configure Radius connector in his InWebo account (2 min)
Perform a test authentication (1 min)
Basically, the whole system can be up and running in 15 minutes.
Configure Radius Authentication on BoostEdge
In this example, we will take for granted that you already have a BoostEdge server up and running, with a service configured to protect your web application (which we will further refer to as “myapp”: http://myapp.customer.com).
If so, you will need to:
Modify this regular service to use authentication
Create a new “authentication” service that will display a login page and connect to a radius server
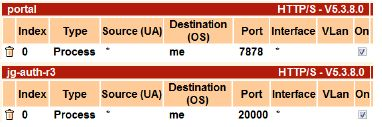
Connect to your BoostEdge Administration interface. Go to Setup → Services. In this example, We have a frontend service waiting on port 7878, and an authentication service waiting for requests on port 2000. All requests to myapp.customer.com are managed by the “FrontEnd” service.

Edit the “FrontEnd” service. In the left pane menu, got to Security → Auth. Client and create a new Authentication Client called “inwebo”. In the “Redirection Url” field, type the IP address of the BoostEdge Server with port 2000, as specified earlier on the service rule:
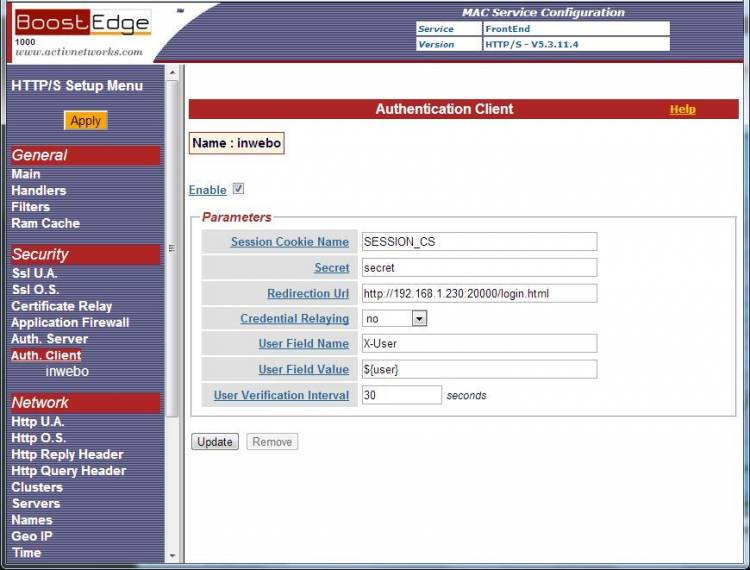
Click on “new” then “Apply”.
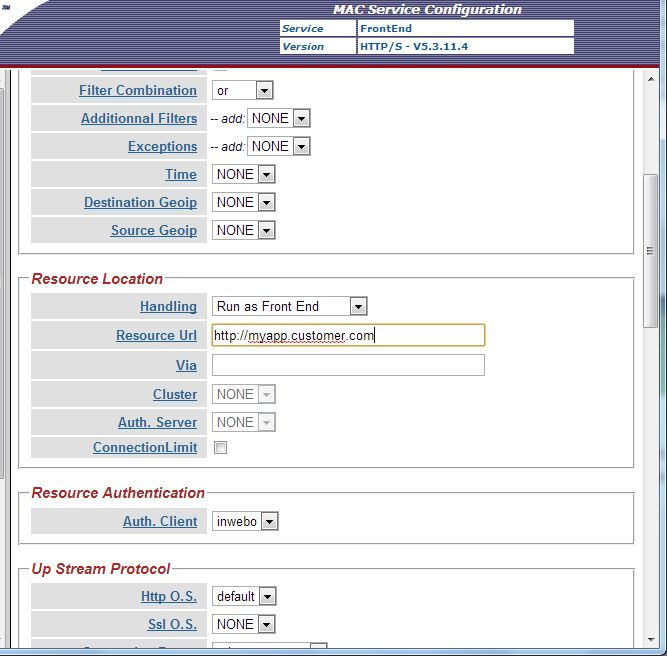
Then, go to “Handlers” and edit the appropriate handler. In “Resource Authentication”, select the “inwebo” auth client.
N.B.: If you are using BoostEdge as a Reverse Proxy in front of an application, you will probably have to configure “Credential Relaying” at this stage.
Click “update” and “Apply”.
Close the “FrontEnd” service and open the “authentication” service. Go to Security → Auth. Server and create a new authentication server called “inwebo”. Type in the IP addresses of the 2 InWebo radius servers, and choose a Shared secret (the Radius secret is a string that will be used to cipher the Radius requests).
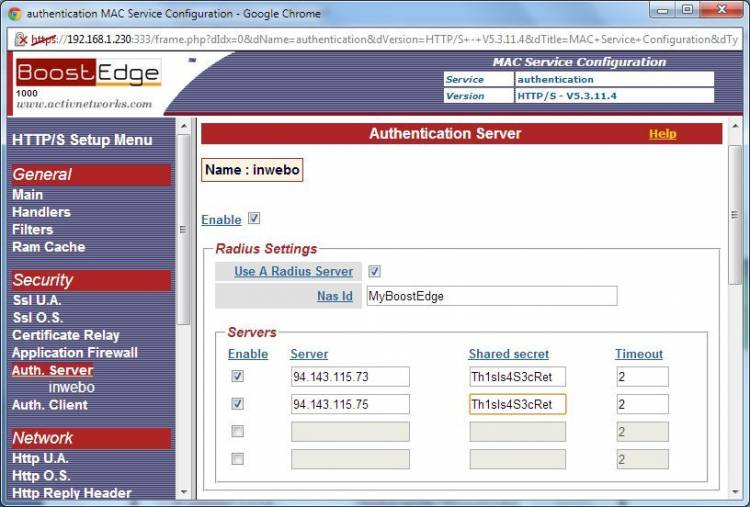
Click “new” and “Apply”.
Finally, upload 2 HTML files called “login.html” and “error.tpl” in the “authentication” directory of your BoostEdge: ftp://boostedge_ip_address/authentication (authentication is the name of your “authentication” service).
Login.html
<html>
	<head>
		<meta http-equiv="pragma" content="no-cache">
	</head>
	<style>
	.reason {
		color: blue;
		font-weight:bold;
	}
	.BD {
		background-color:#DDD;
	}
	</style>
	<body class="BD">
		<center>
		<br>
		<h2>Access to Application</h2>
		<br>
		<form name="logon" method=POST>
			<table>
				<tr><td><input type="text" name="user" value="${user}" autocomplete="off"></td></tr>
				<tr><td><input type="password" name="pass" value=""></td></tr>
				<tr><td><input type="submit" name="submit" value="Submit"></td></tr>
				<tr><td><span class="reason">${reason}</span></td></tr>
			</table>
			${hidden}
		</form>
		</center>
	</body>
</html>
Error.tpl
<html>
	<head>
		<style>
		.reason {
		color:blue;
		font-weight:bold;
		}
		.BD {
		background-color:#DDD;
		}
		</style>
	</head>
	<body class="BD">
		<center>
			<br>
			<h2>Applications Authentication Server</h2>
			<br>
			<table>
				<tr>
				<td>Error:</td>
				<td><span class="reason">${reason}</span></td>
				</tr>
			</table>
		</center>
	</body>
</html>
Your BoostEdge server is now configured.
Configure InWebo Radius connector
You can create your own InWebo account at InWebo Signup page. This will give you access to you InWebo Administration Console, using the My InWebo button of your browser extension.
Once connected, go to “Secure Sites” tab
In the “Connectors” part, choose “Radius” in the drop-down list of possible connectors
Fill in the “IP Address” field with the IP of the public interface of your BoostEdge servers
Enter the Radius secret you have defined earlier
Validate your connector configuration by pressing “Update” button.
Please note that “Any modification made to your radius configuration will be applied within the next 15 minutes.”.
Then, in the “Secured Site” part of the screen, select “Add a secured site of type……”, and choose “Radius”:
A popup windows appears.
Enter a name for the Bookmark
Enter the url of the application that is protected by your BoostEdge Server. If this application is reachable from the internet, you can choose “Automatic detection” to to pre-fill the other fields. Otherwise, you will have to enter them manually.
Authentication page is the URL of the BoostEdge login page, but without the “https:”.
Form name, Login Field name and Password field name are the HTML elements of the login.html file that you created earlier.
Click “Add”.
You InWebo account is now fully configured.
Test Authentication on your App
Open a browser to the url http://myapp.customer.com, which will be redirected to BoostEdge login page. Since you are using InWebo, the authentication popup will appear automatically, prompting you for your InWebo password.
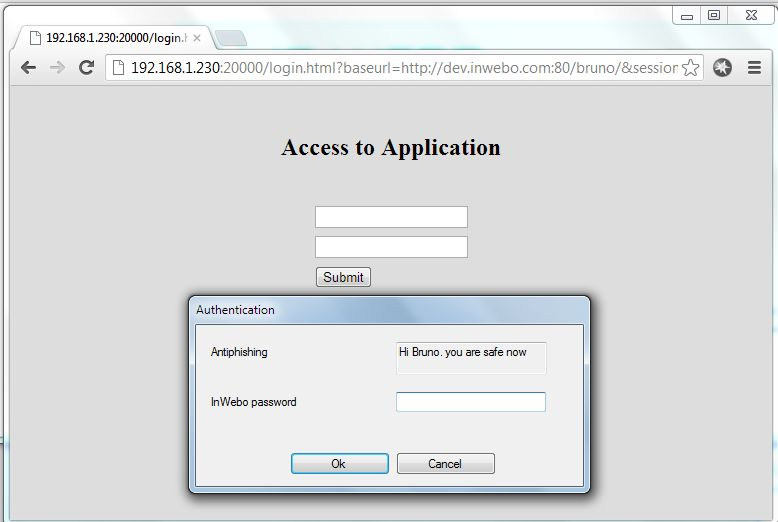
Click “ok”. InWebo application generates a One-Time-Password, and fills the BoostEdge login form without user intervention.
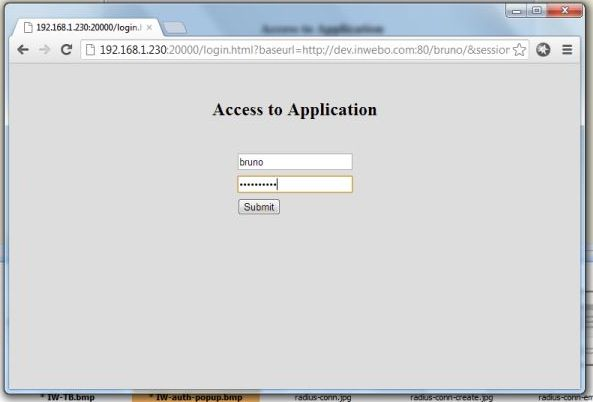
It will also submit automatically the request to BoostEdge. If the One-Time-Password is valid, you will be directly connected to your application.